Supabase setup
Connecting your Trickle app to Supabase is quick and easy. Just follow these simple steps to get started:Step 1 - Create a Supabase Account
Set up your Supabase account. You can create a new account here, or log in if you already have one.Step 2 - Create a New Project
Once logged in, navigate to the Projects dropdown and click ‘+ New Project’ to create a new Supabase project.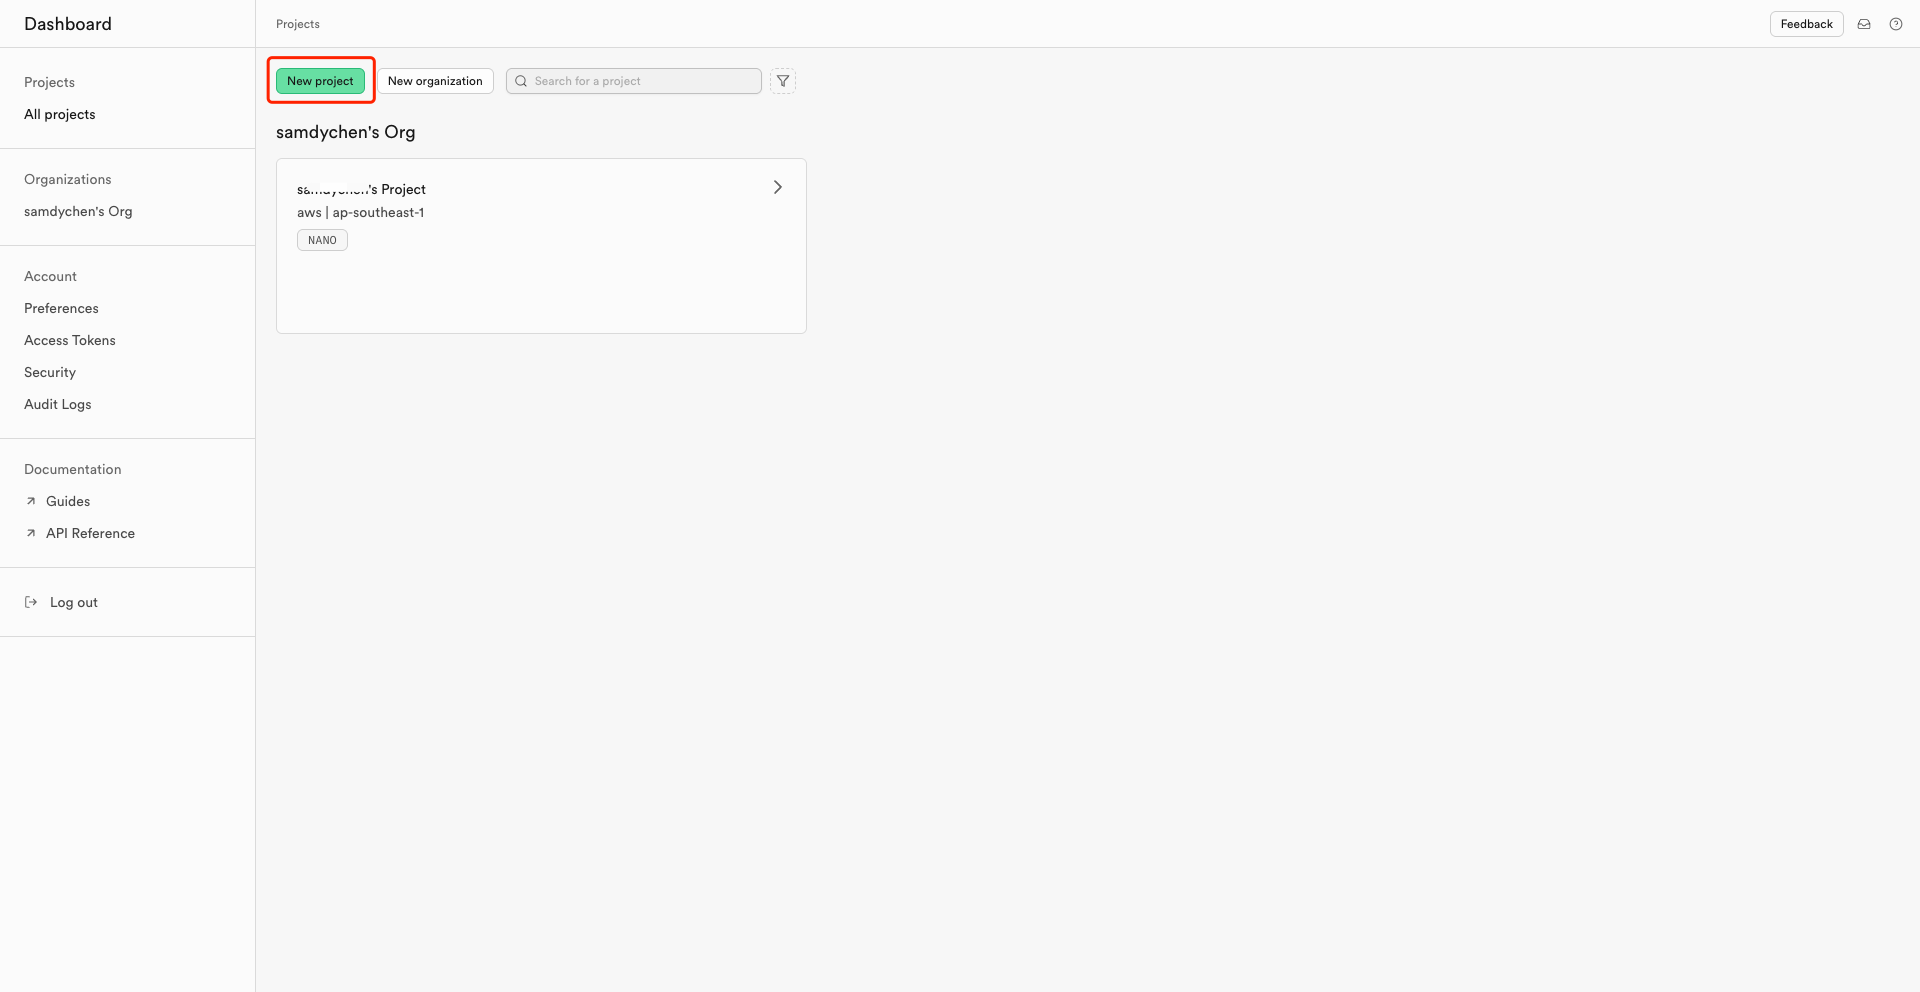
Step 3 - Connect Supabase to Trickle
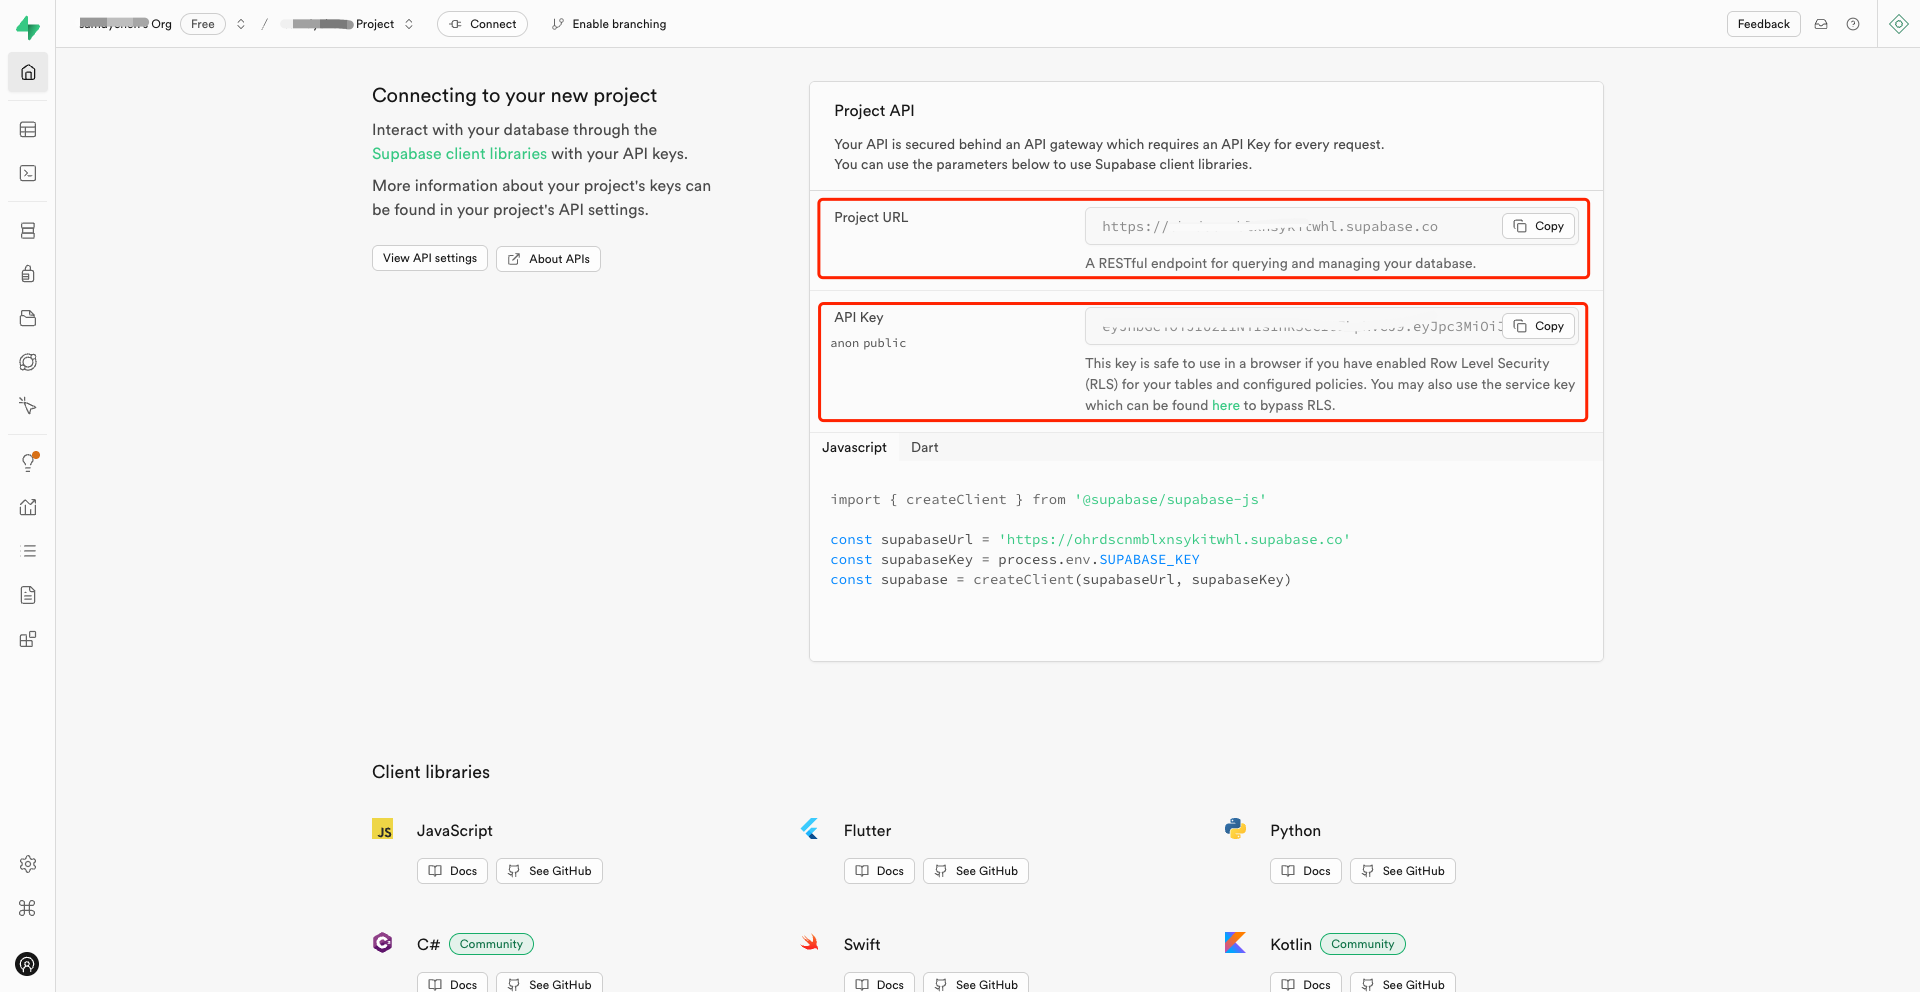
To link your Supabase project with your Trickle app, follow these steps:- At your project Home, scroll down to ‘Connecting to your new project.’ Get your Supabase Project URL and the Anonymous Public API Key.
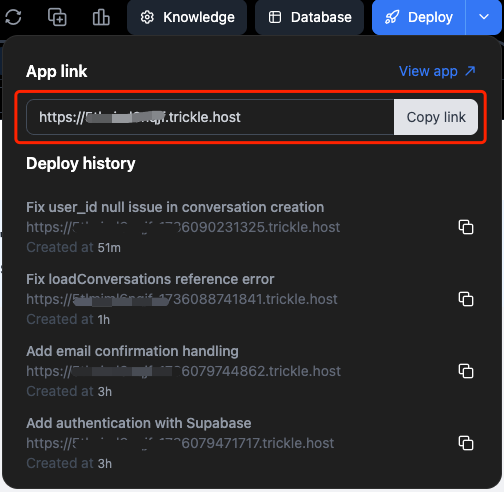
 2. Copy your Trickle App Link.
Trickle setup
Go back to Trickle and navigate to the specific project you want to connect to Supabase:Step 1 - Knowledge Configuration
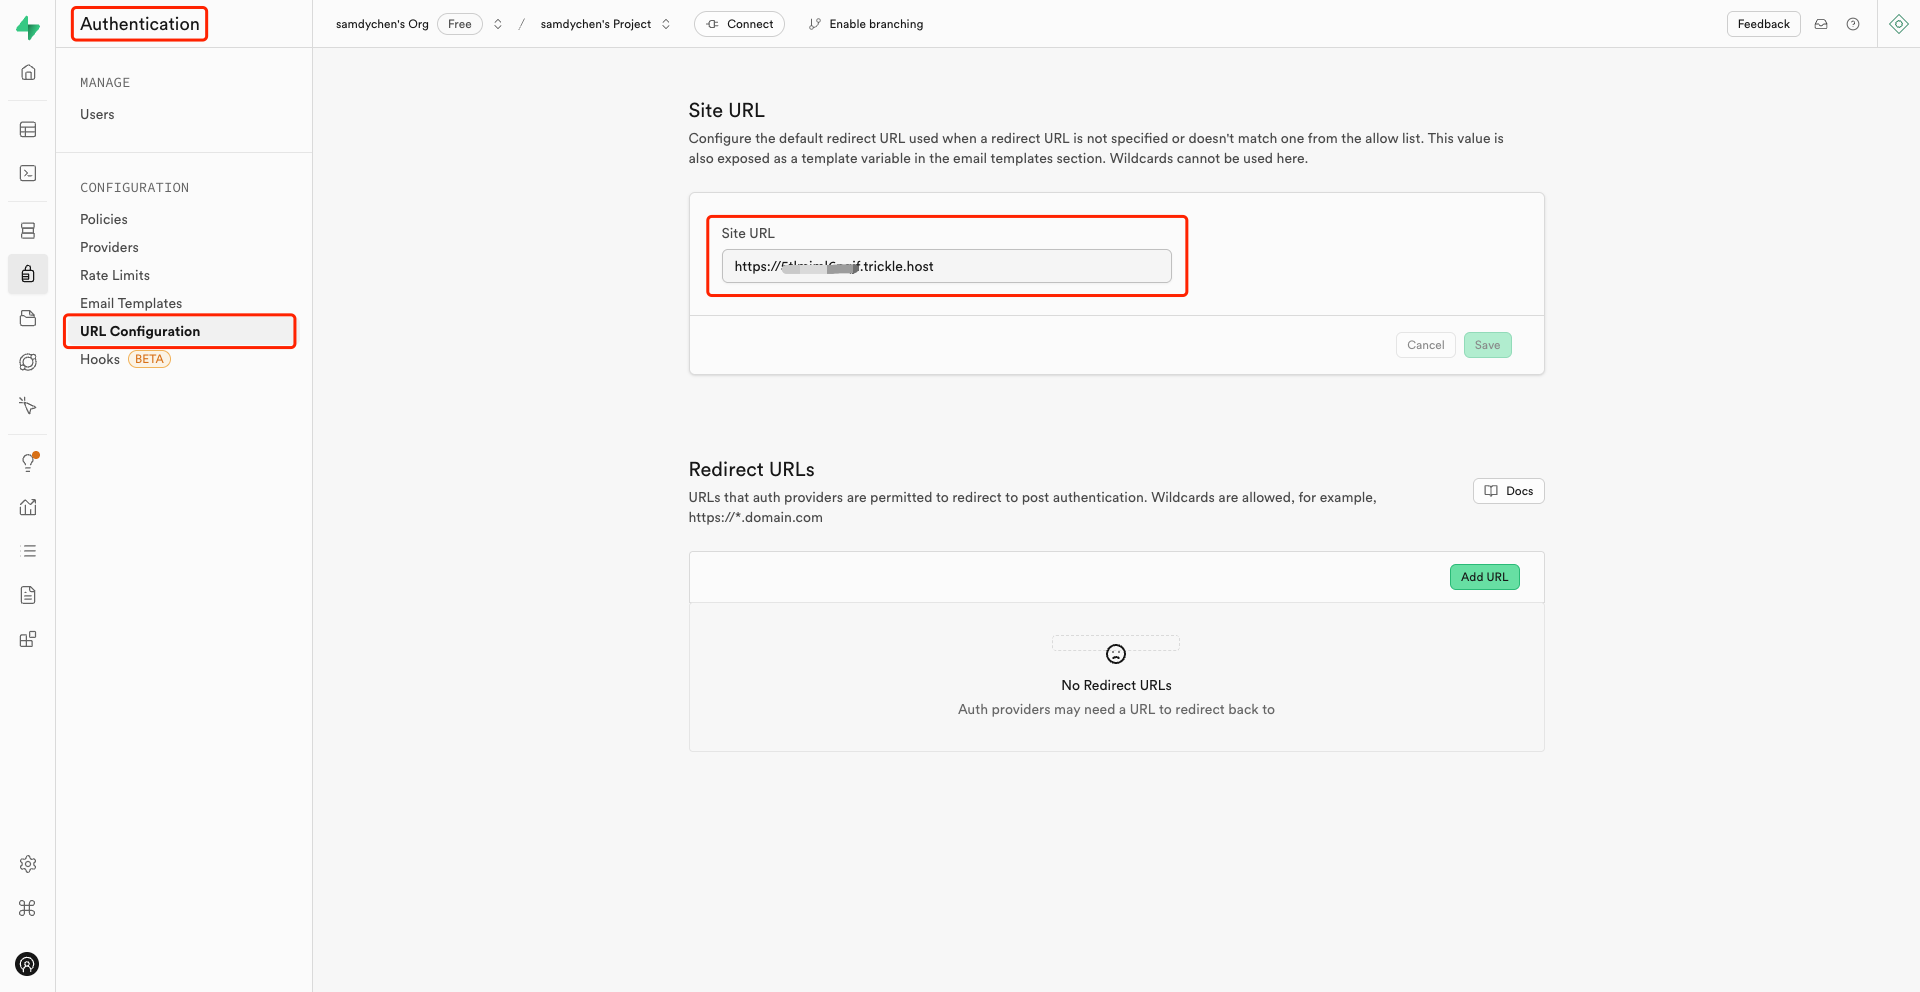
Copy the following setup instructions into the Knowledge panel. Insert your Project URL and Anonymous Public API Key into the corresponding fields, and replace the Site URL for Authentication and Redirect URL with your own values.Script copy paste to Trickle Knowledge
Step 2 - Add account sign-up and sign-in functionality using Supabase authentication
-
Prompt “Add login/signup page using Supabase,” and Trickle AI will automatically build the onboarding page and integrate it with Supabase using the authentication API.

-
Create an account on your Trickle App. When you sign up with your email, Supabase will send a verification email to your address.
 3. Check the user account in your Supabase project.

Step 3 - Save and Retrieve Data with Supabase
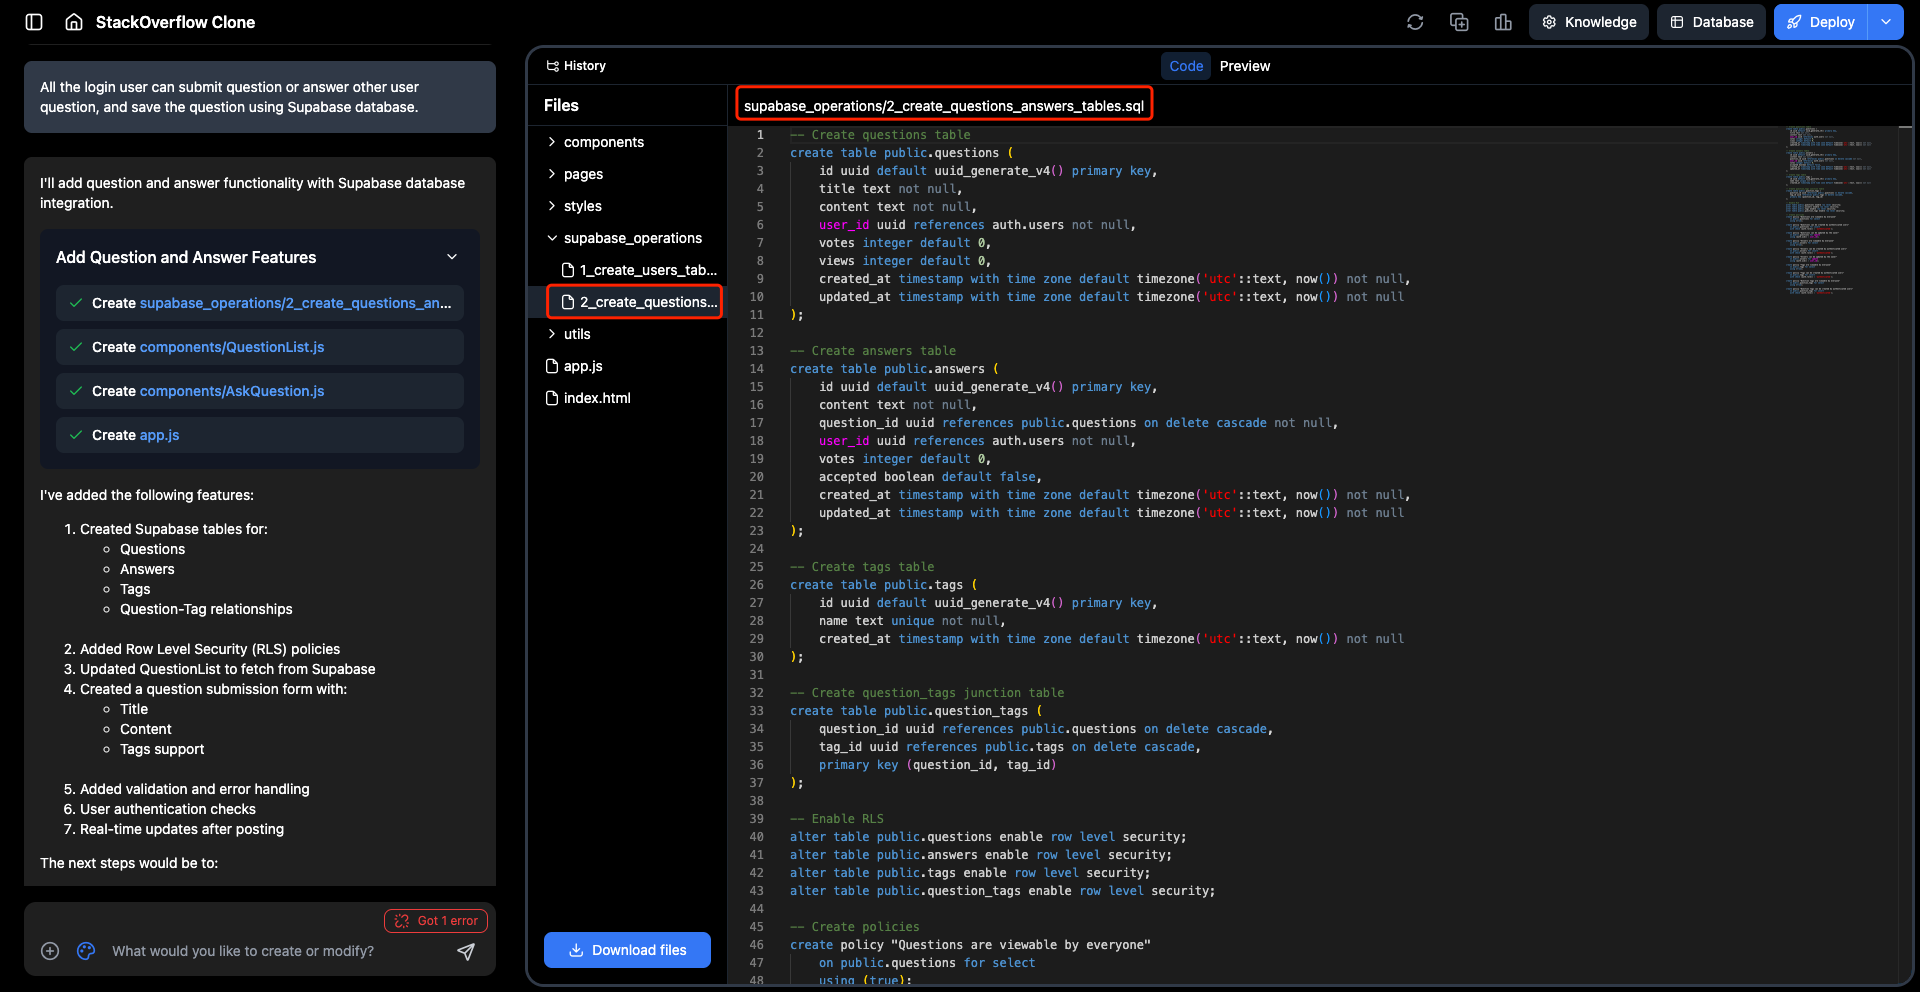
Save or fetch data using the Supabase database. By using a prompt like “Save data using Supabase database,” Trickle AI will automatically generate the data structure and utilize the Supabase database API to save or retrieve data. Below is an example:- Prompt “All logged-in users can submit questions or answer other users’ questions, and save the questions using the Supabase database.”
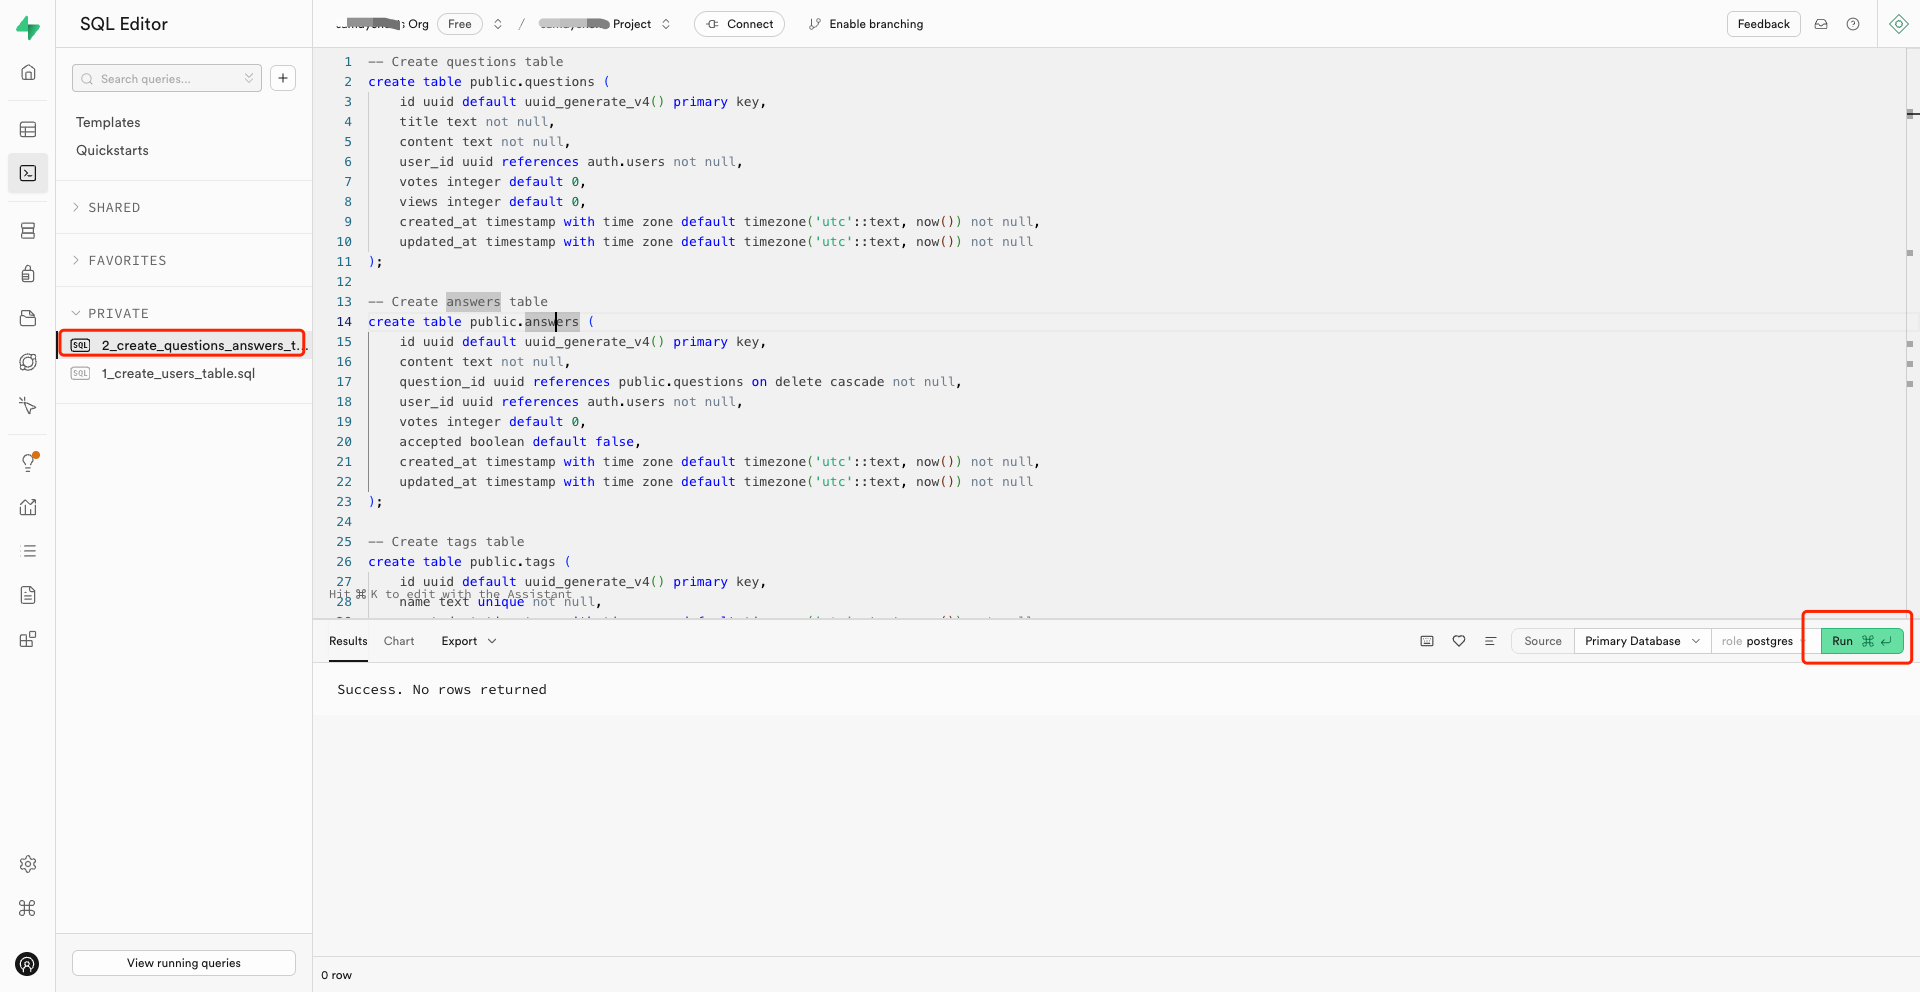
 2. Copy and paste the SQL file content into your Supabase project and run the SQL script.
