Trickle Magic Canvas
Magic Canvas brings human–AI co-creation to life. On a single visual canvas, you can build full applications and websites from scratch. Trickle Magic Canvas is the first agentic canvas for AI collaboration. Here, humans and AI create side by side, turning ideas into fully functional apps and sites. This guide introduces the core concepts, key features, and workflows to help you get started quickly and efficiently.What is Magic Canvas?
Magic Canvas is not just another no-code board or a simple prompt box. It is a context-driven, multimodal workspace where AI interprets your intent through multiple inputs:- Page layouts (components and structure)
- Content inputs (prompts, instructions, edits)
- Logic rules (notes, constraints, relationships)
- Assets and data (images, databases, references)
Quick Start with Magic Canvas
Enter Canvas Mode
Switch to Canvas mode from the homepage. Enter your first prompt, or upload an image reference, and AI will generate the initial page and content directly on the canvas.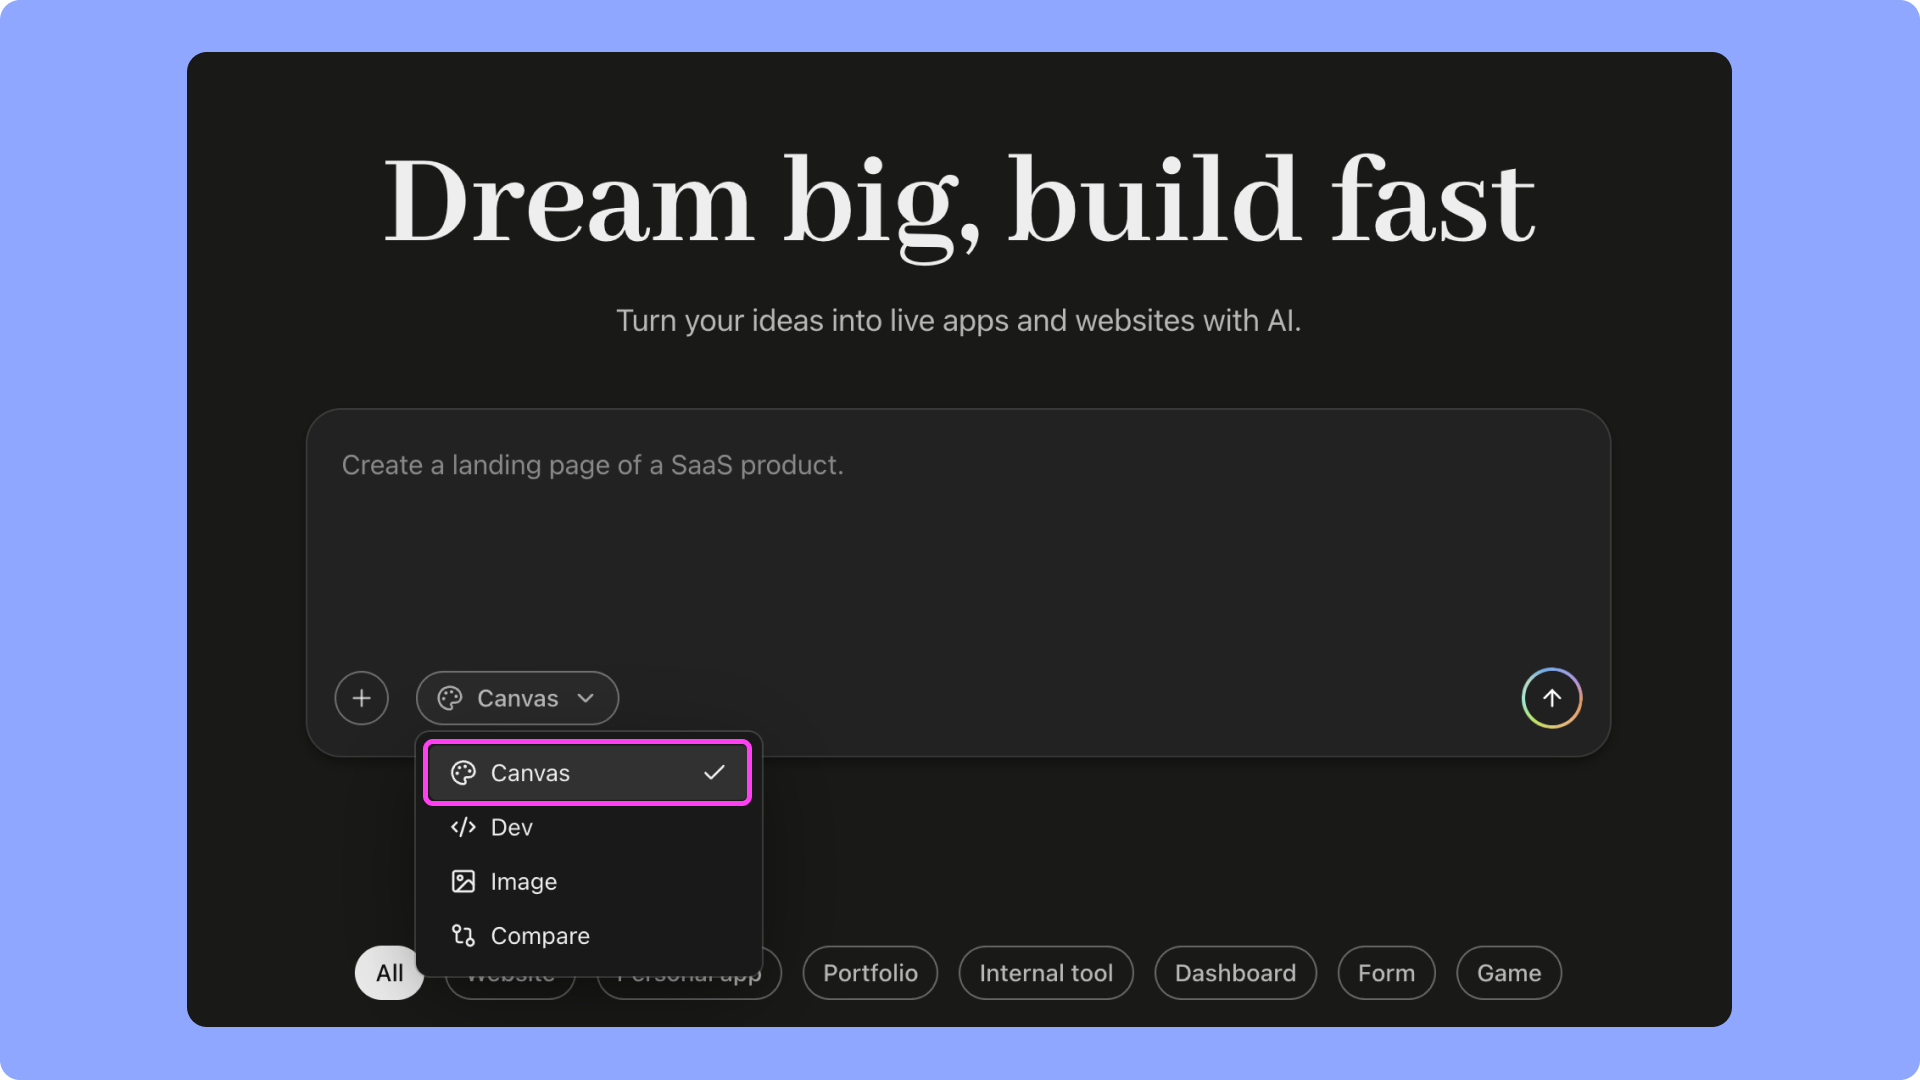

Upload Brand Assets
Drag and drop your logo or images into the Asset area and label them clearly. AI can then reference and reuse them across the project.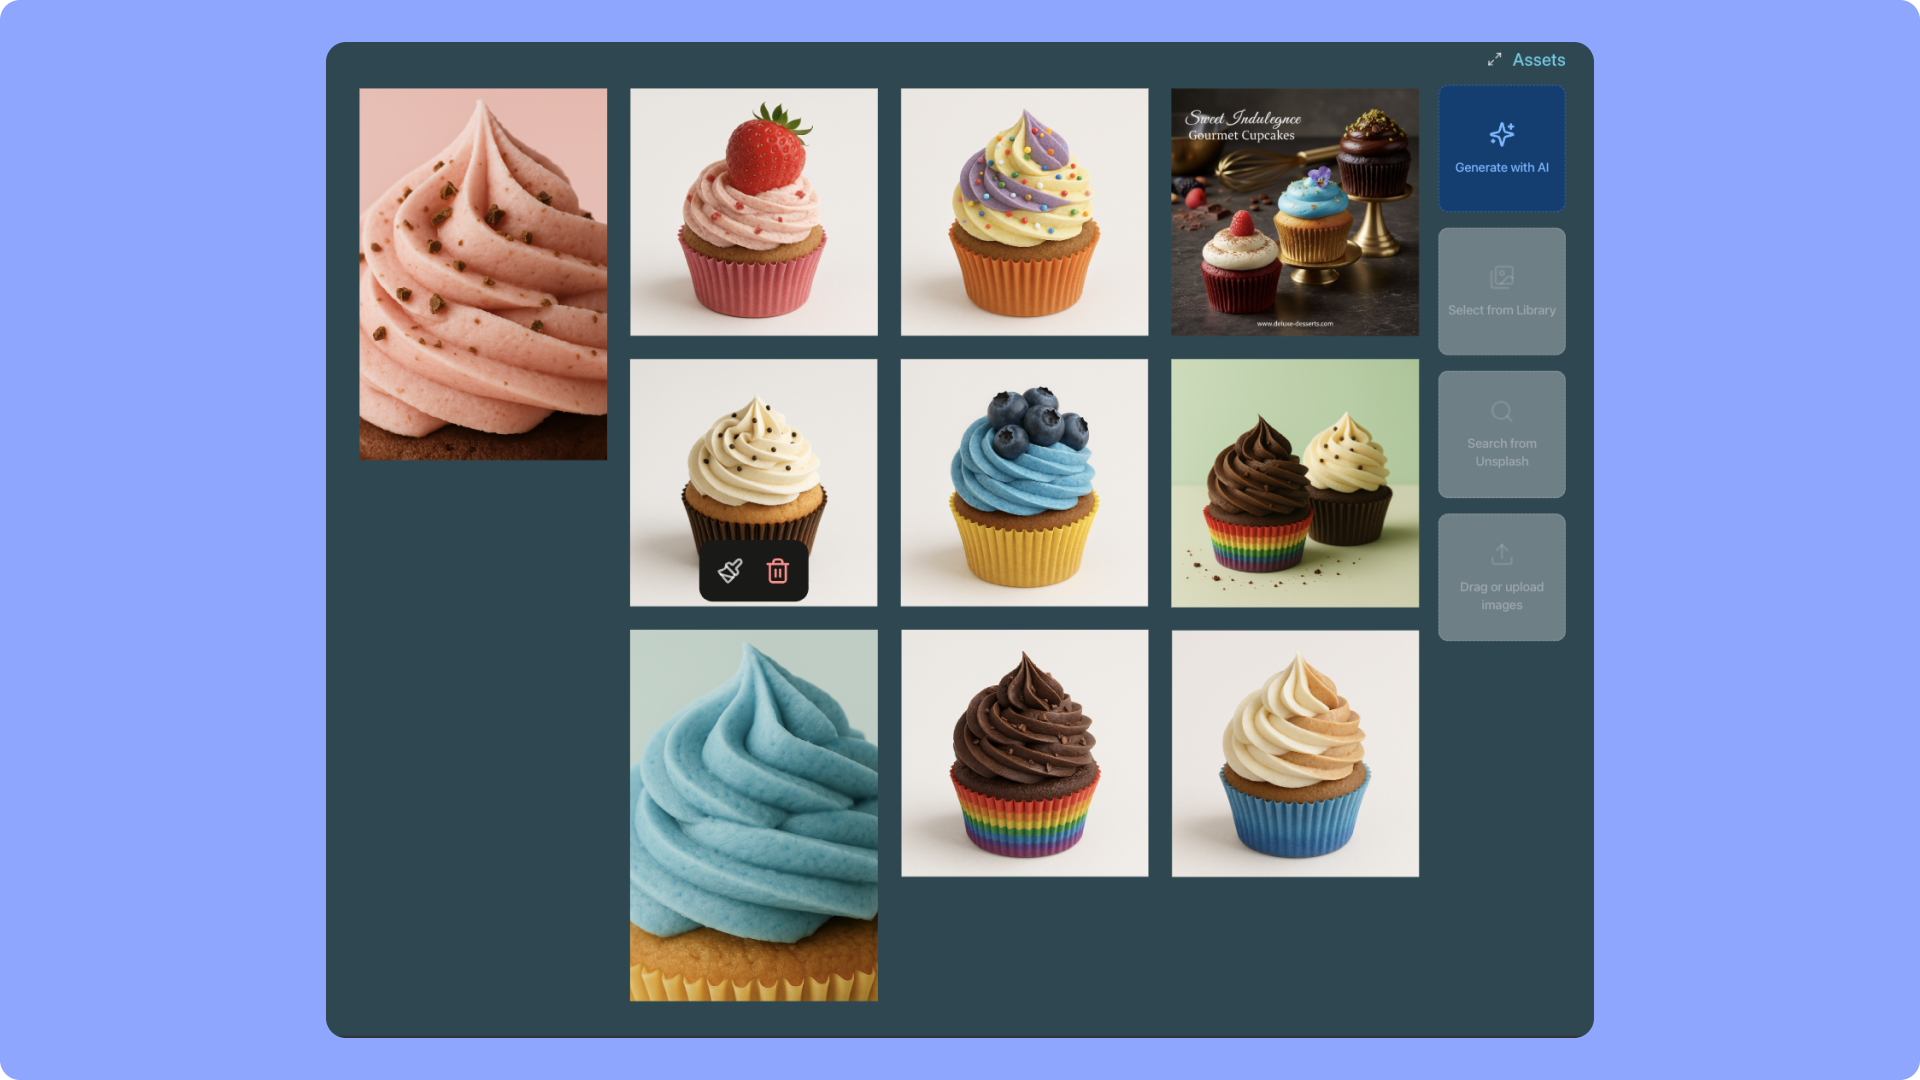
- Generate new images with AI (powered by Gemini 2.5 Flash Image, also known as nano-banana)
- Recreate or enhance existing assets
- Import from the global library or search Unsplash
- Seamlessly insert generated visuals into your website
Enable Database (if needed)
For projects with dynamic content, AI can automatically create a database with linked fields. You can also manually activate it with a prompt, defining collections and entries.
Add Rules and Notes
Write key rules or notes directly on the canvas—style guides, tone, response formats—to help AI align better with your needs. Coding Agents can also infer and extend these rules automatically.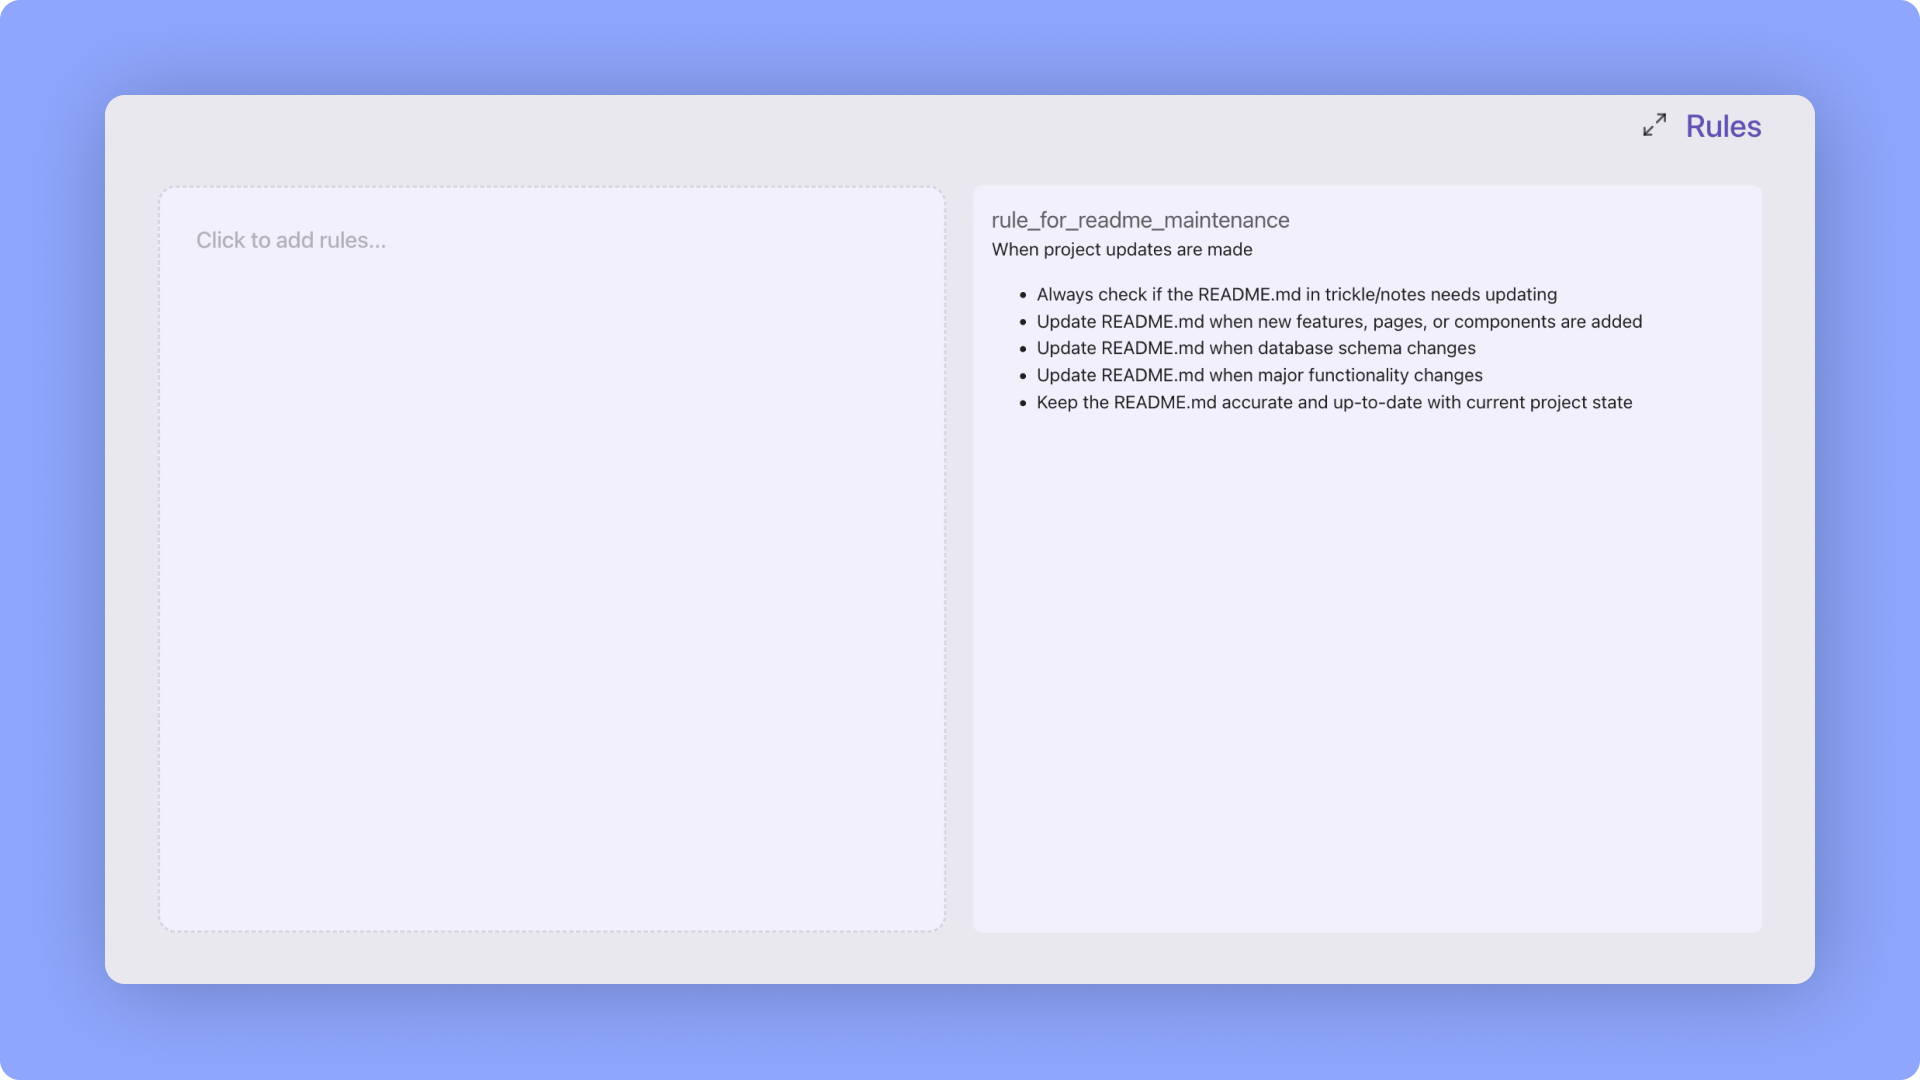
Inject Business Knowledge
Add product docs, brand guidelines, FAQs, or internal references to improve accuracy. This ensures AI generates results tailored to your real-world scenarios.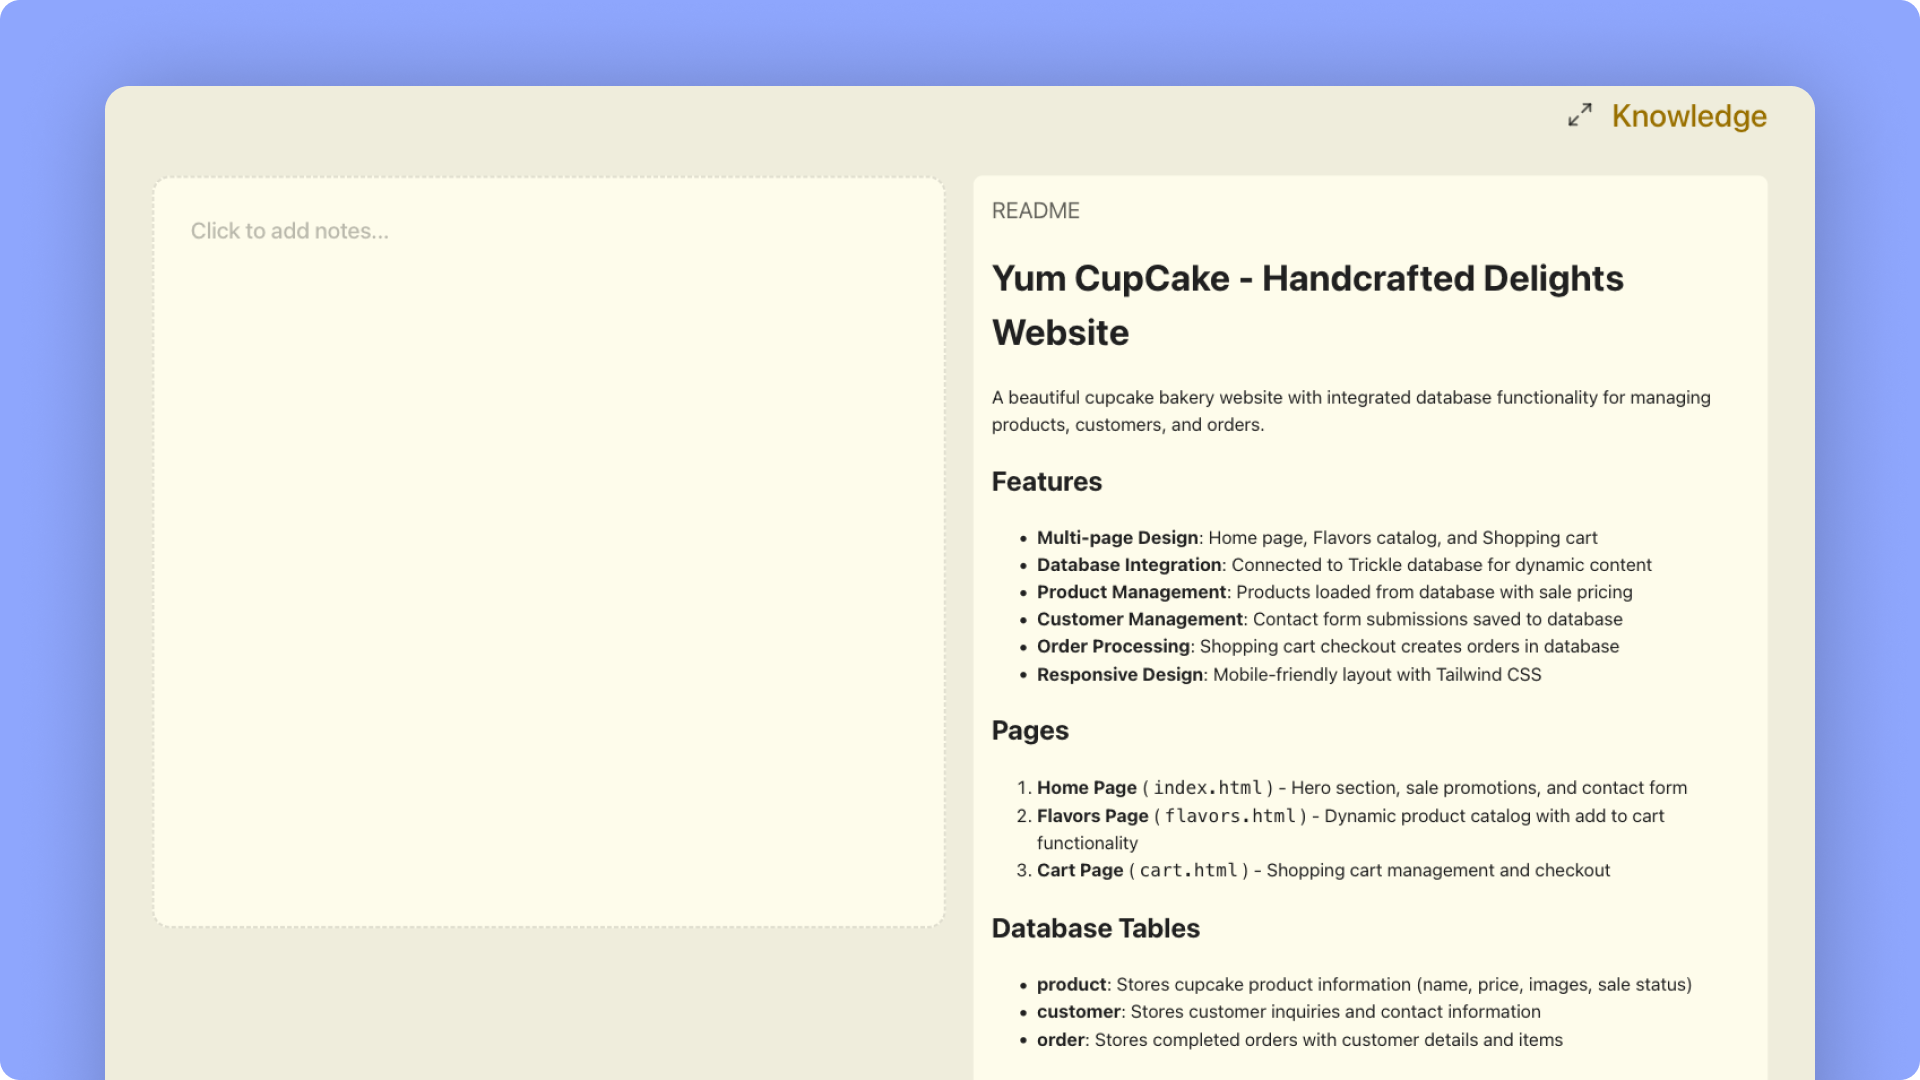
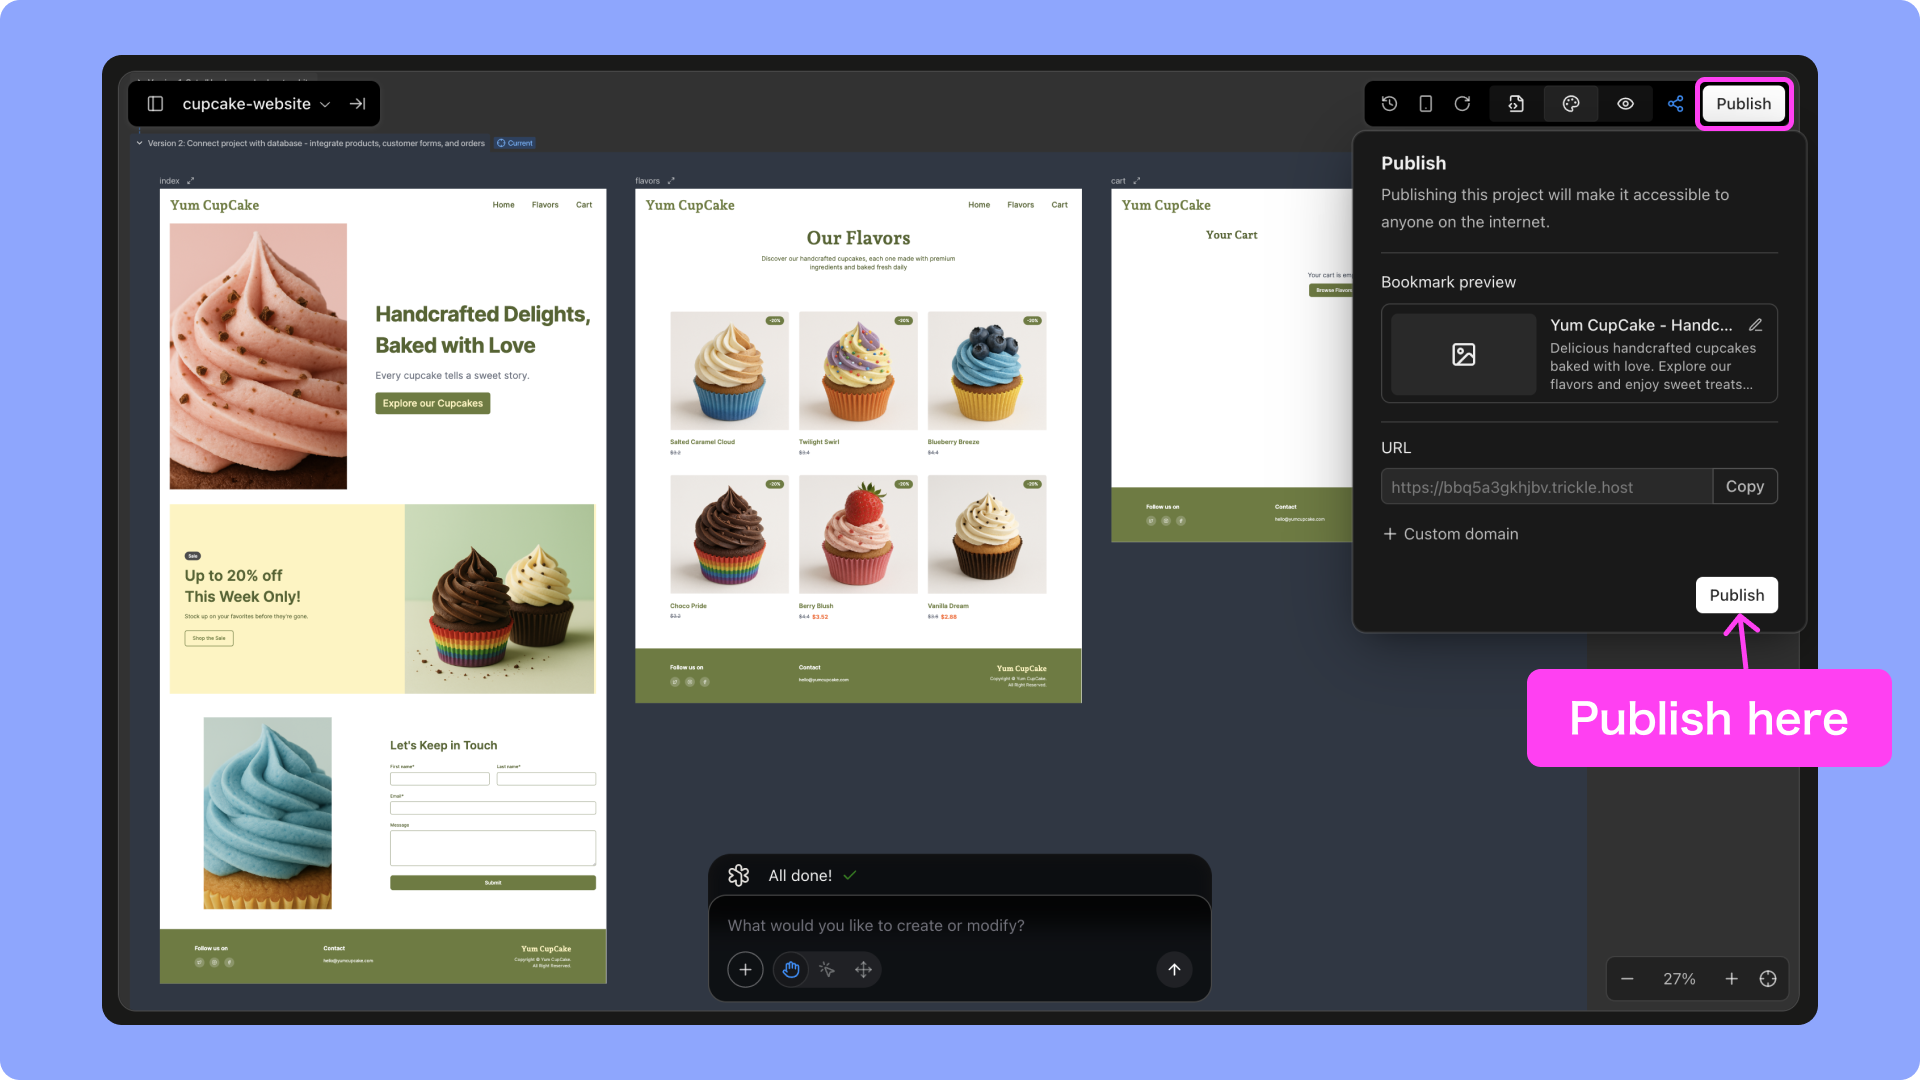
Version History
You can roll back to a previous version by hovering over its name in the history list and clicking Restore.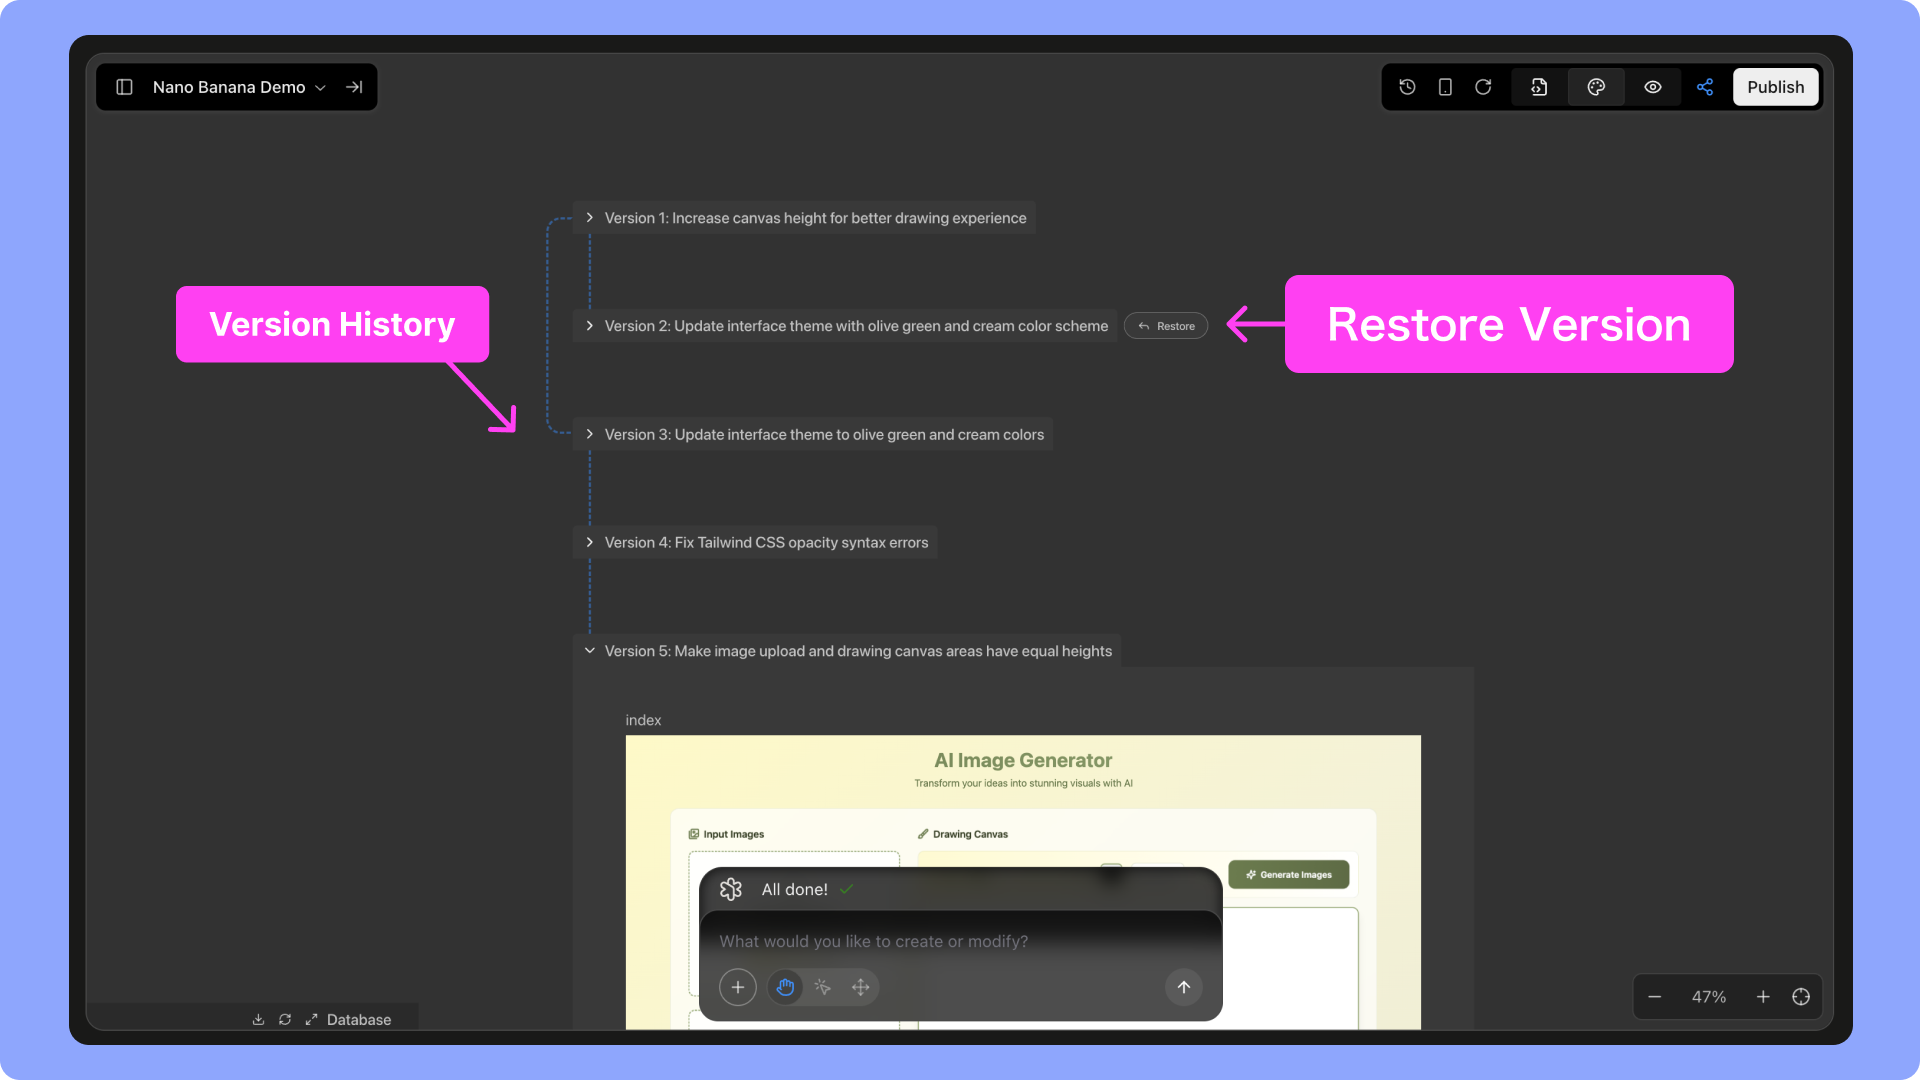
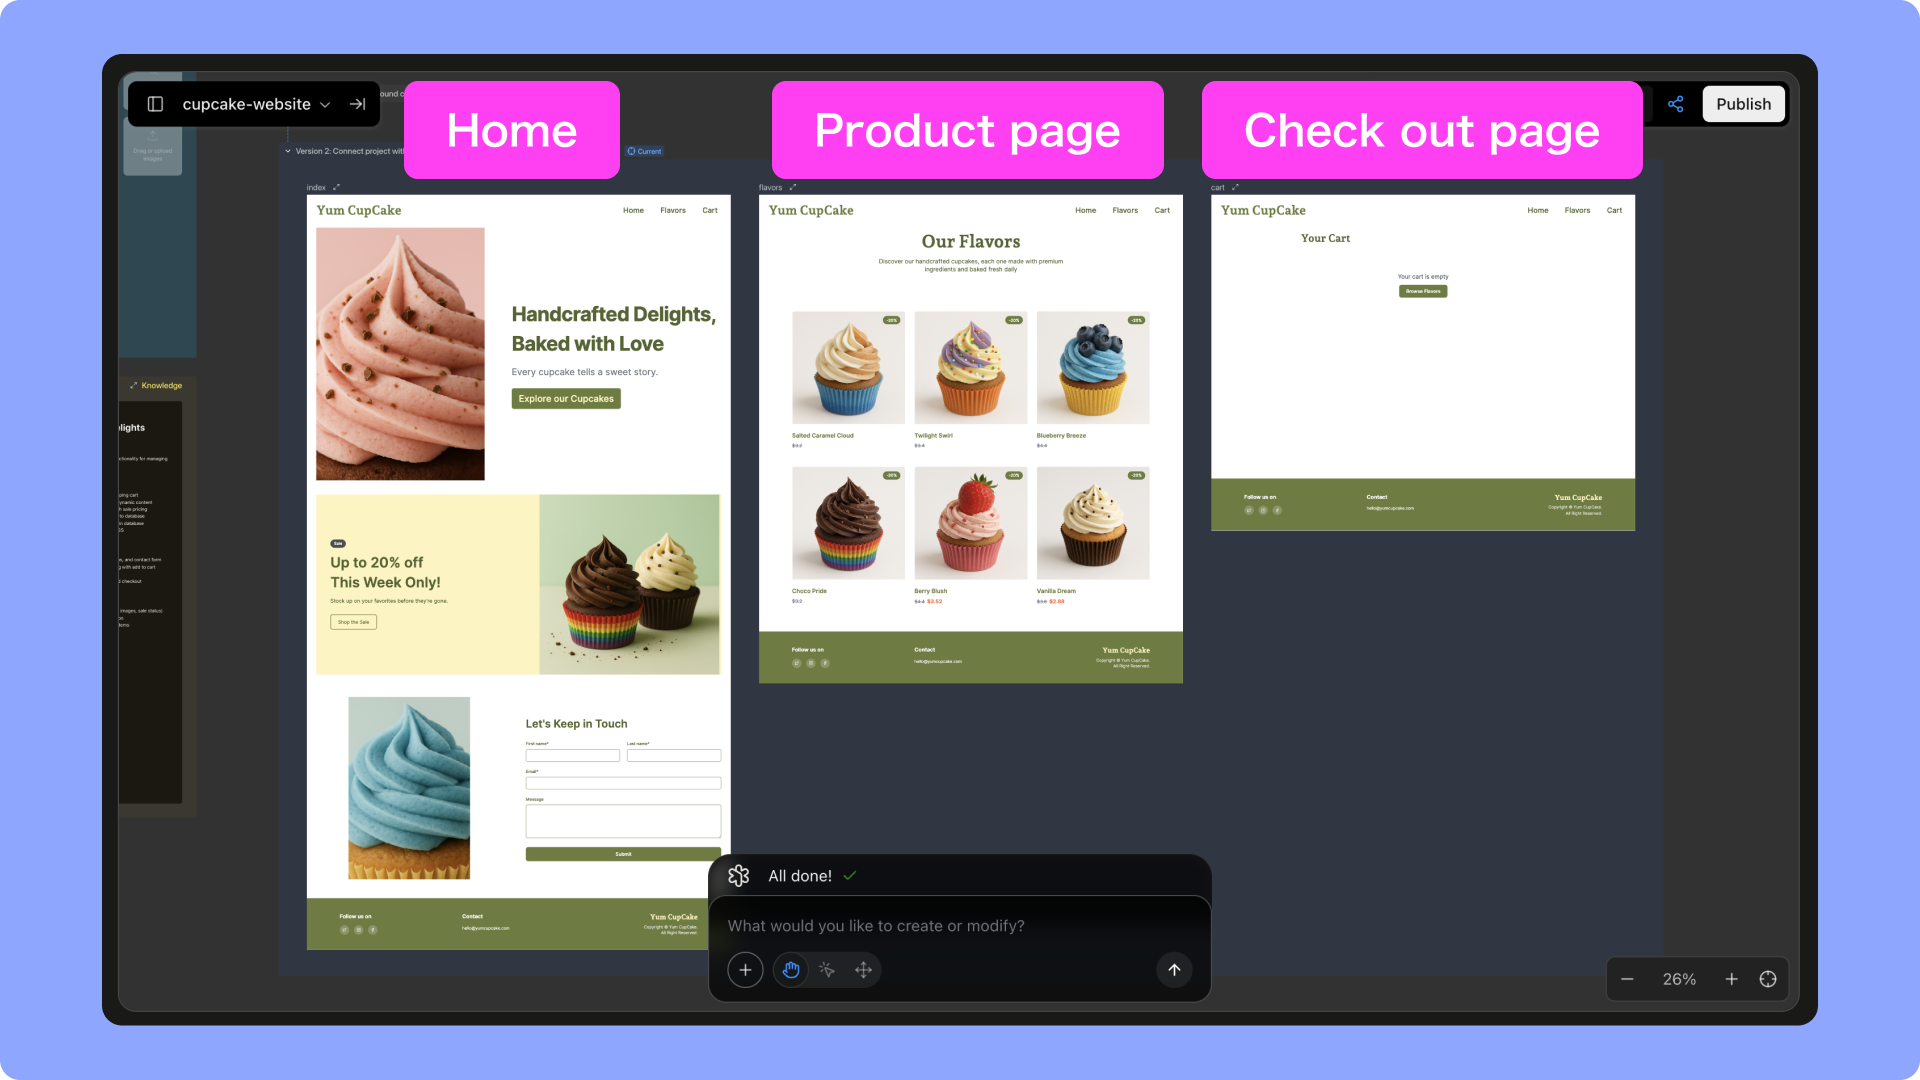
Build Multi-Page Projects
- New Project: Specify the pages you need (e.g., Home, Product Detail, About, Contact). AI generates them in one go and links navigation automatically.
-
Existing Project: Ask AI to add new pages. Just describe the purpose and content, and it will generate them within the current canvas.
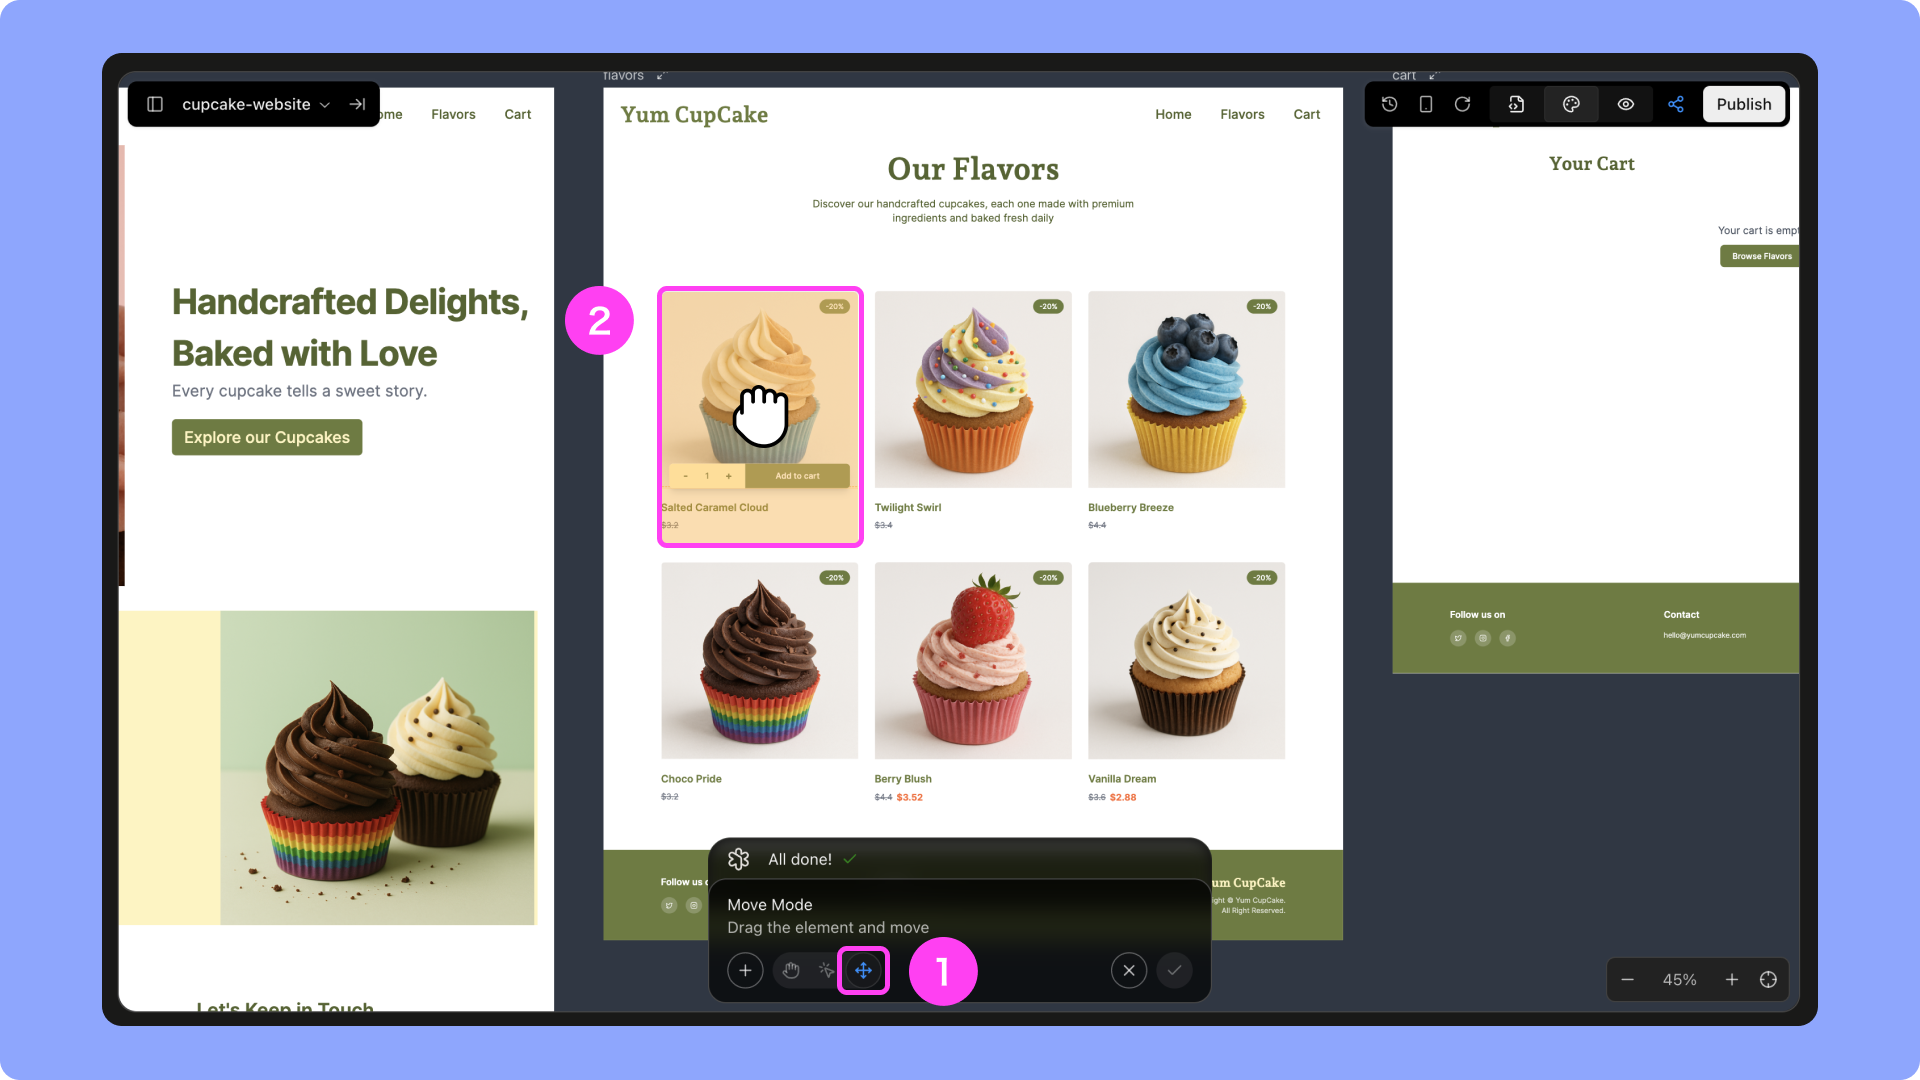
Visual Editing and Drag-and-Drop
-
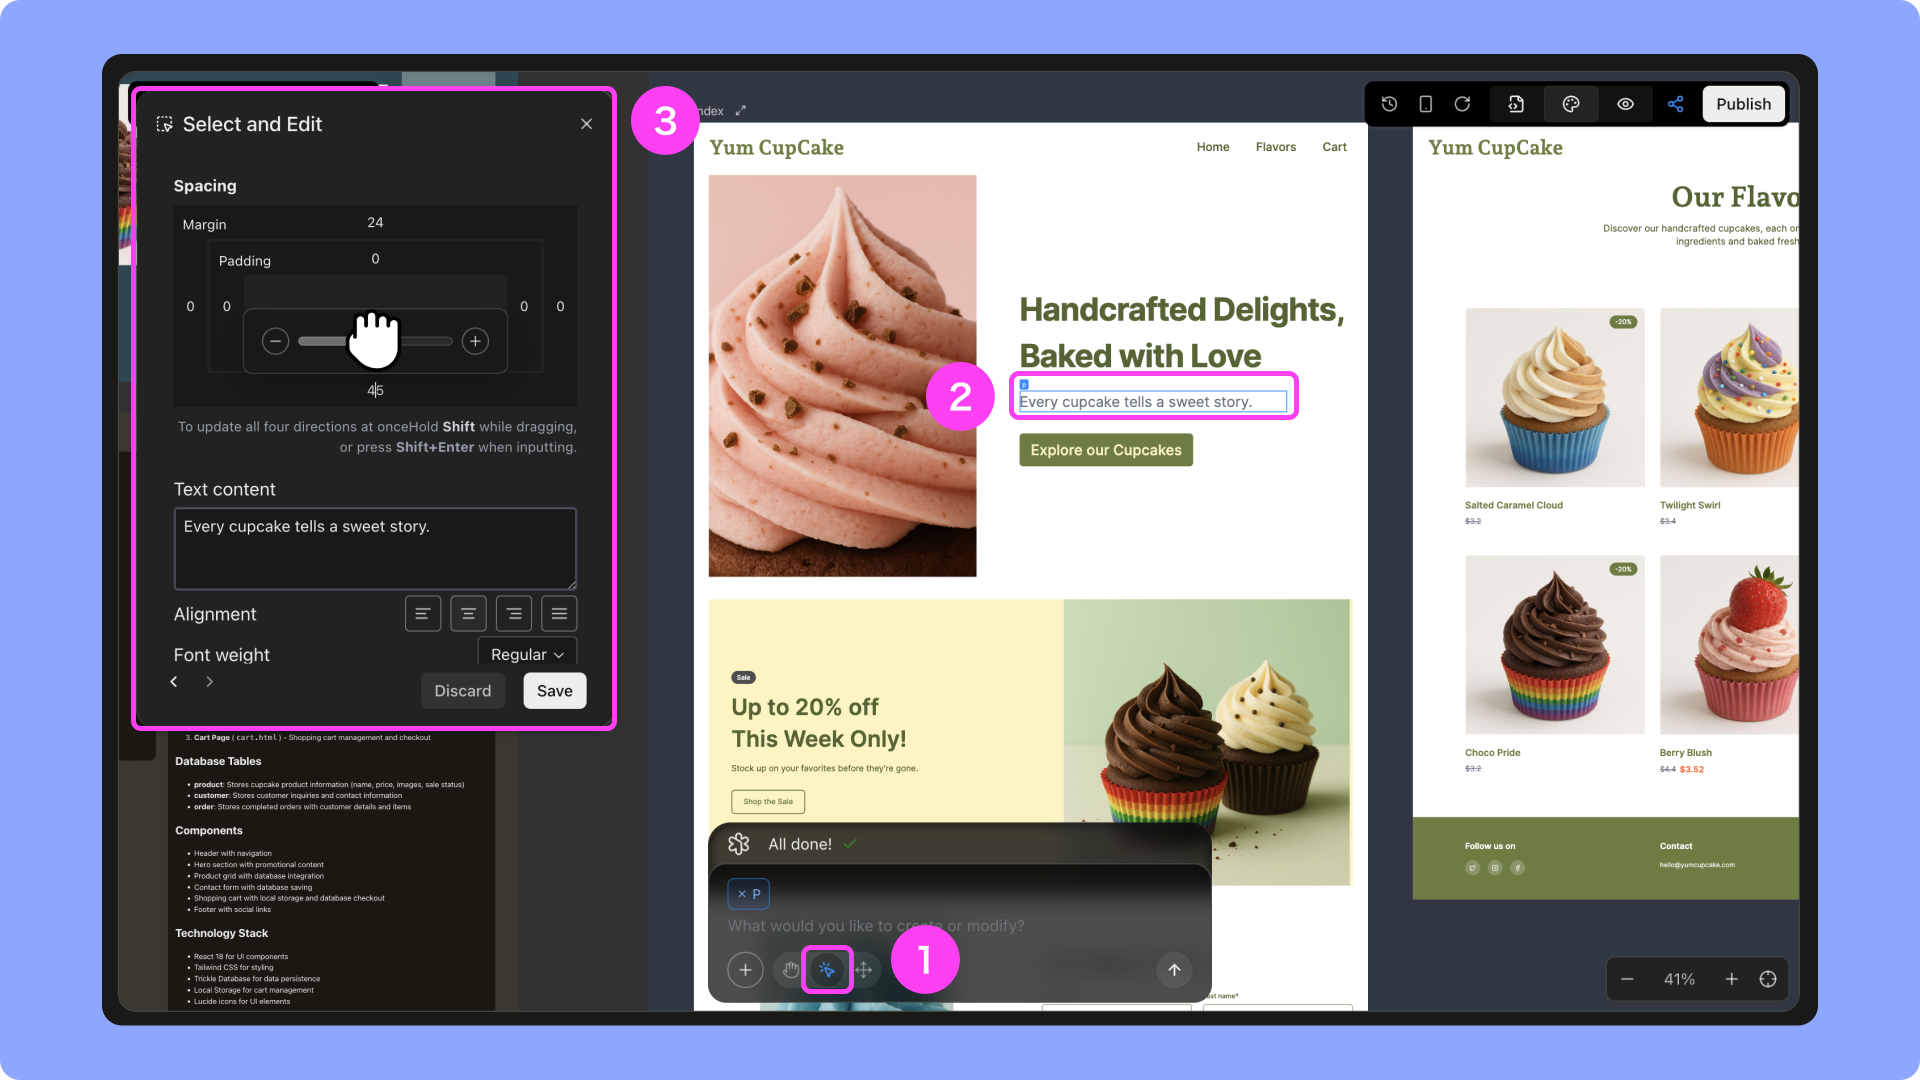
Edit Elements
Click Select to Edit in the chat bar to adjust text, spacing, alignment, or colors.
-
Move Elements
Click Move Element to drag and reposition items on the canvas.