What is Stripe?

Stripe Integration Steps
Register a Stripe account
Sign up at https://stripe.com, activate your account, and link your bank account. Be sure to complete your Business settings, including logo and business information.
Create products and prices on Stripe
Set up your products (e.g. “Pro Plan”) and assign corresponding pricing models (monthly, yearly, etc.).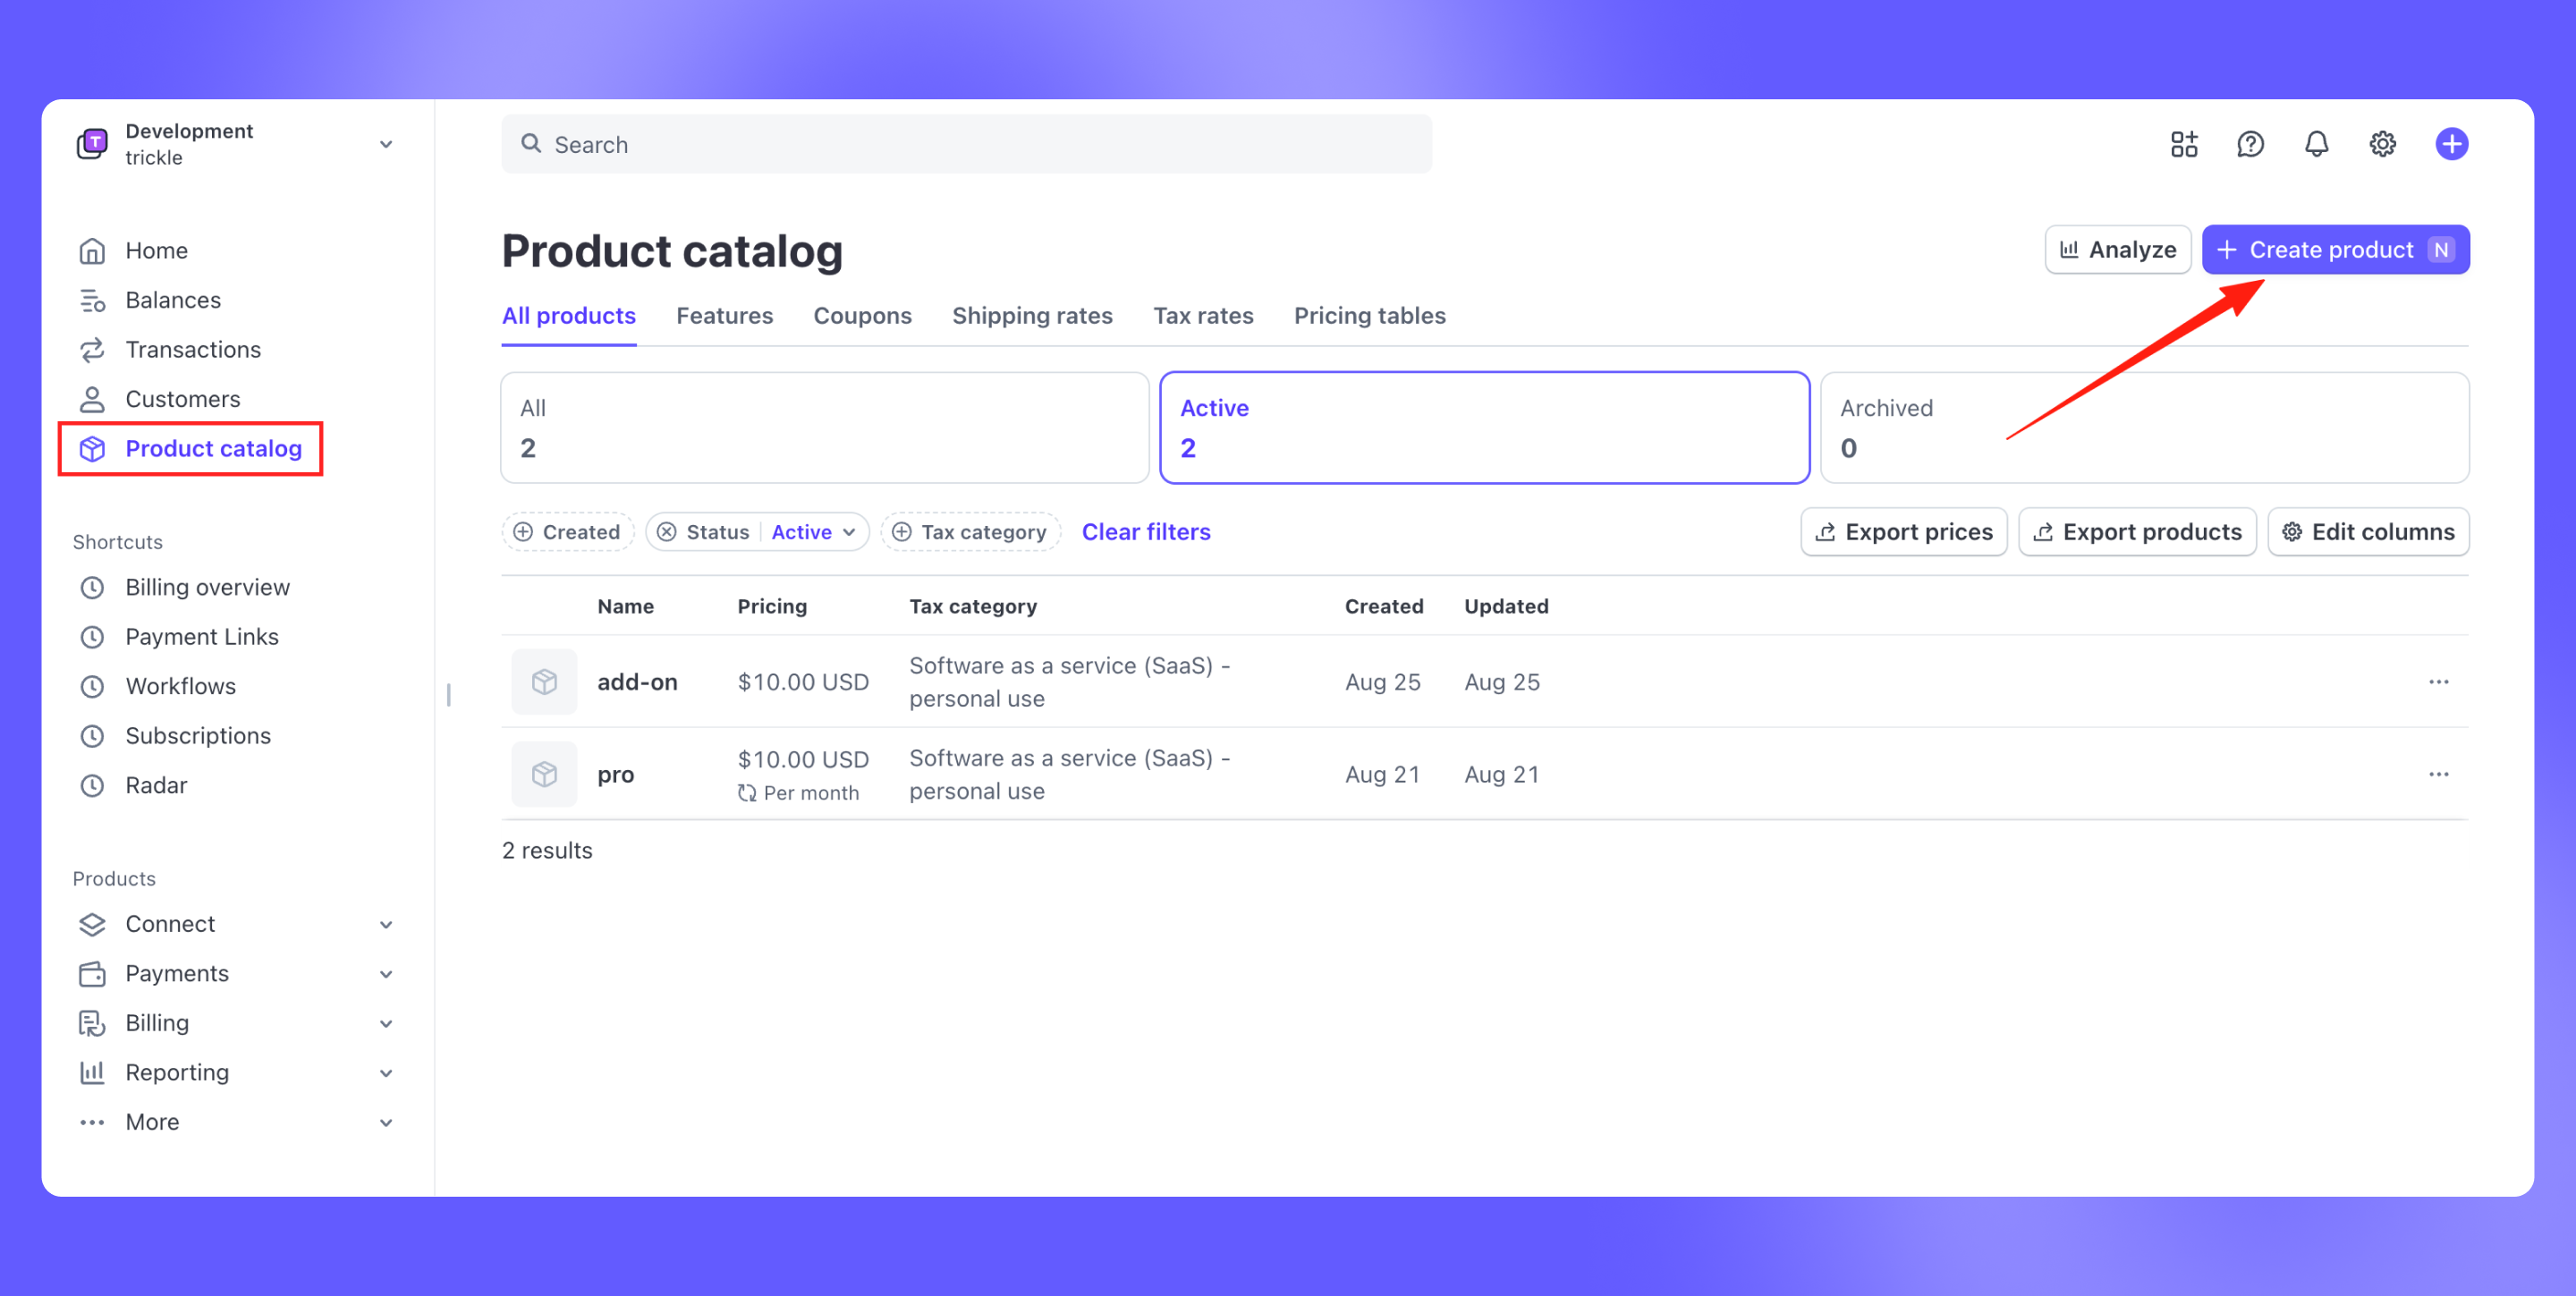
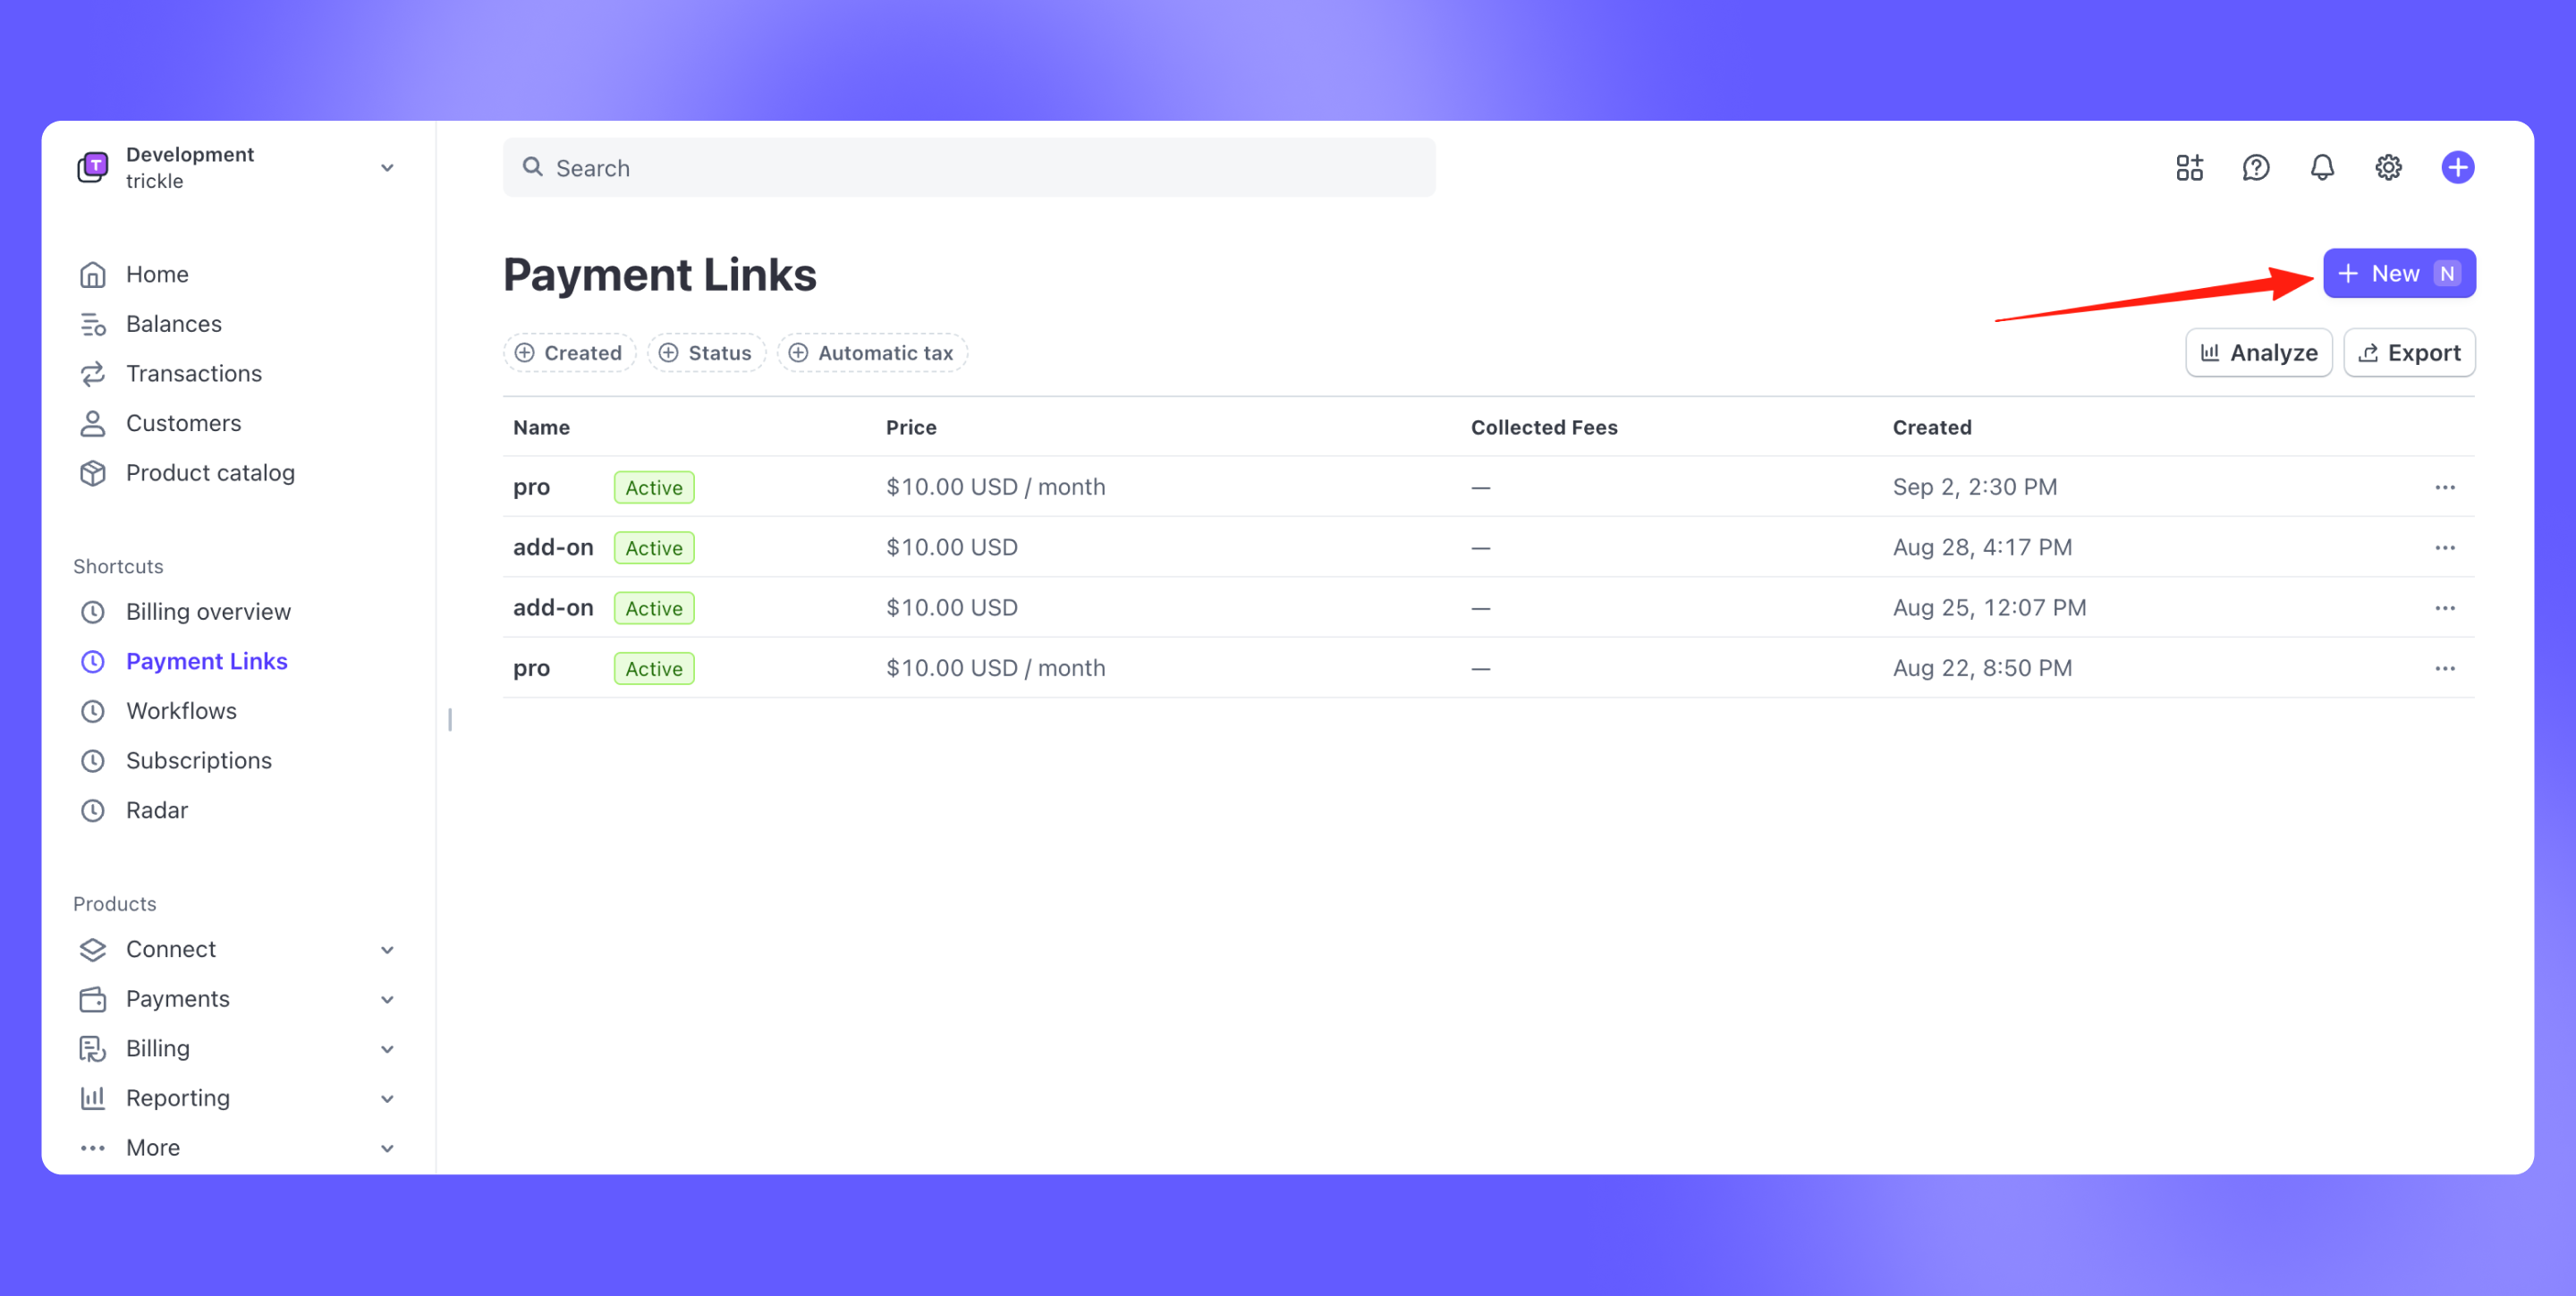
Create a Payment Link on Stripe
Set parameters and preview the checkout page.
-
Create new payment link
-
Configure link parameters and preview the UI on the right-hand side.

Embed the Payment Link in your Trickle App
When users proceed to checkout, they will be redirected to the Stripe-hosted payment page to complete the transaction.Providing the payment link to Trickle AI, and ask AI to link the payment link when checkout.
Stripe Webhook Integration
If you want this process to be fully automated, you’ll need to handle Stripe’s webhook events via a backend service. We recommend integrating with Supabase Edge Functions for this purpose. Additionally, you’ll also have to store user-related data in Supabase.Integrate with Supabse
- Following the instructions to connect Supabase: Supabase integration
- Use Supabase Authentication to manage user registration and login.
- Store user data in Supabase, especially the subscription status field.
- Use Supabase Edge Functions to handle Stripe webhook events. When a payment is completed, update the user’s subscription status in the Supabase database.
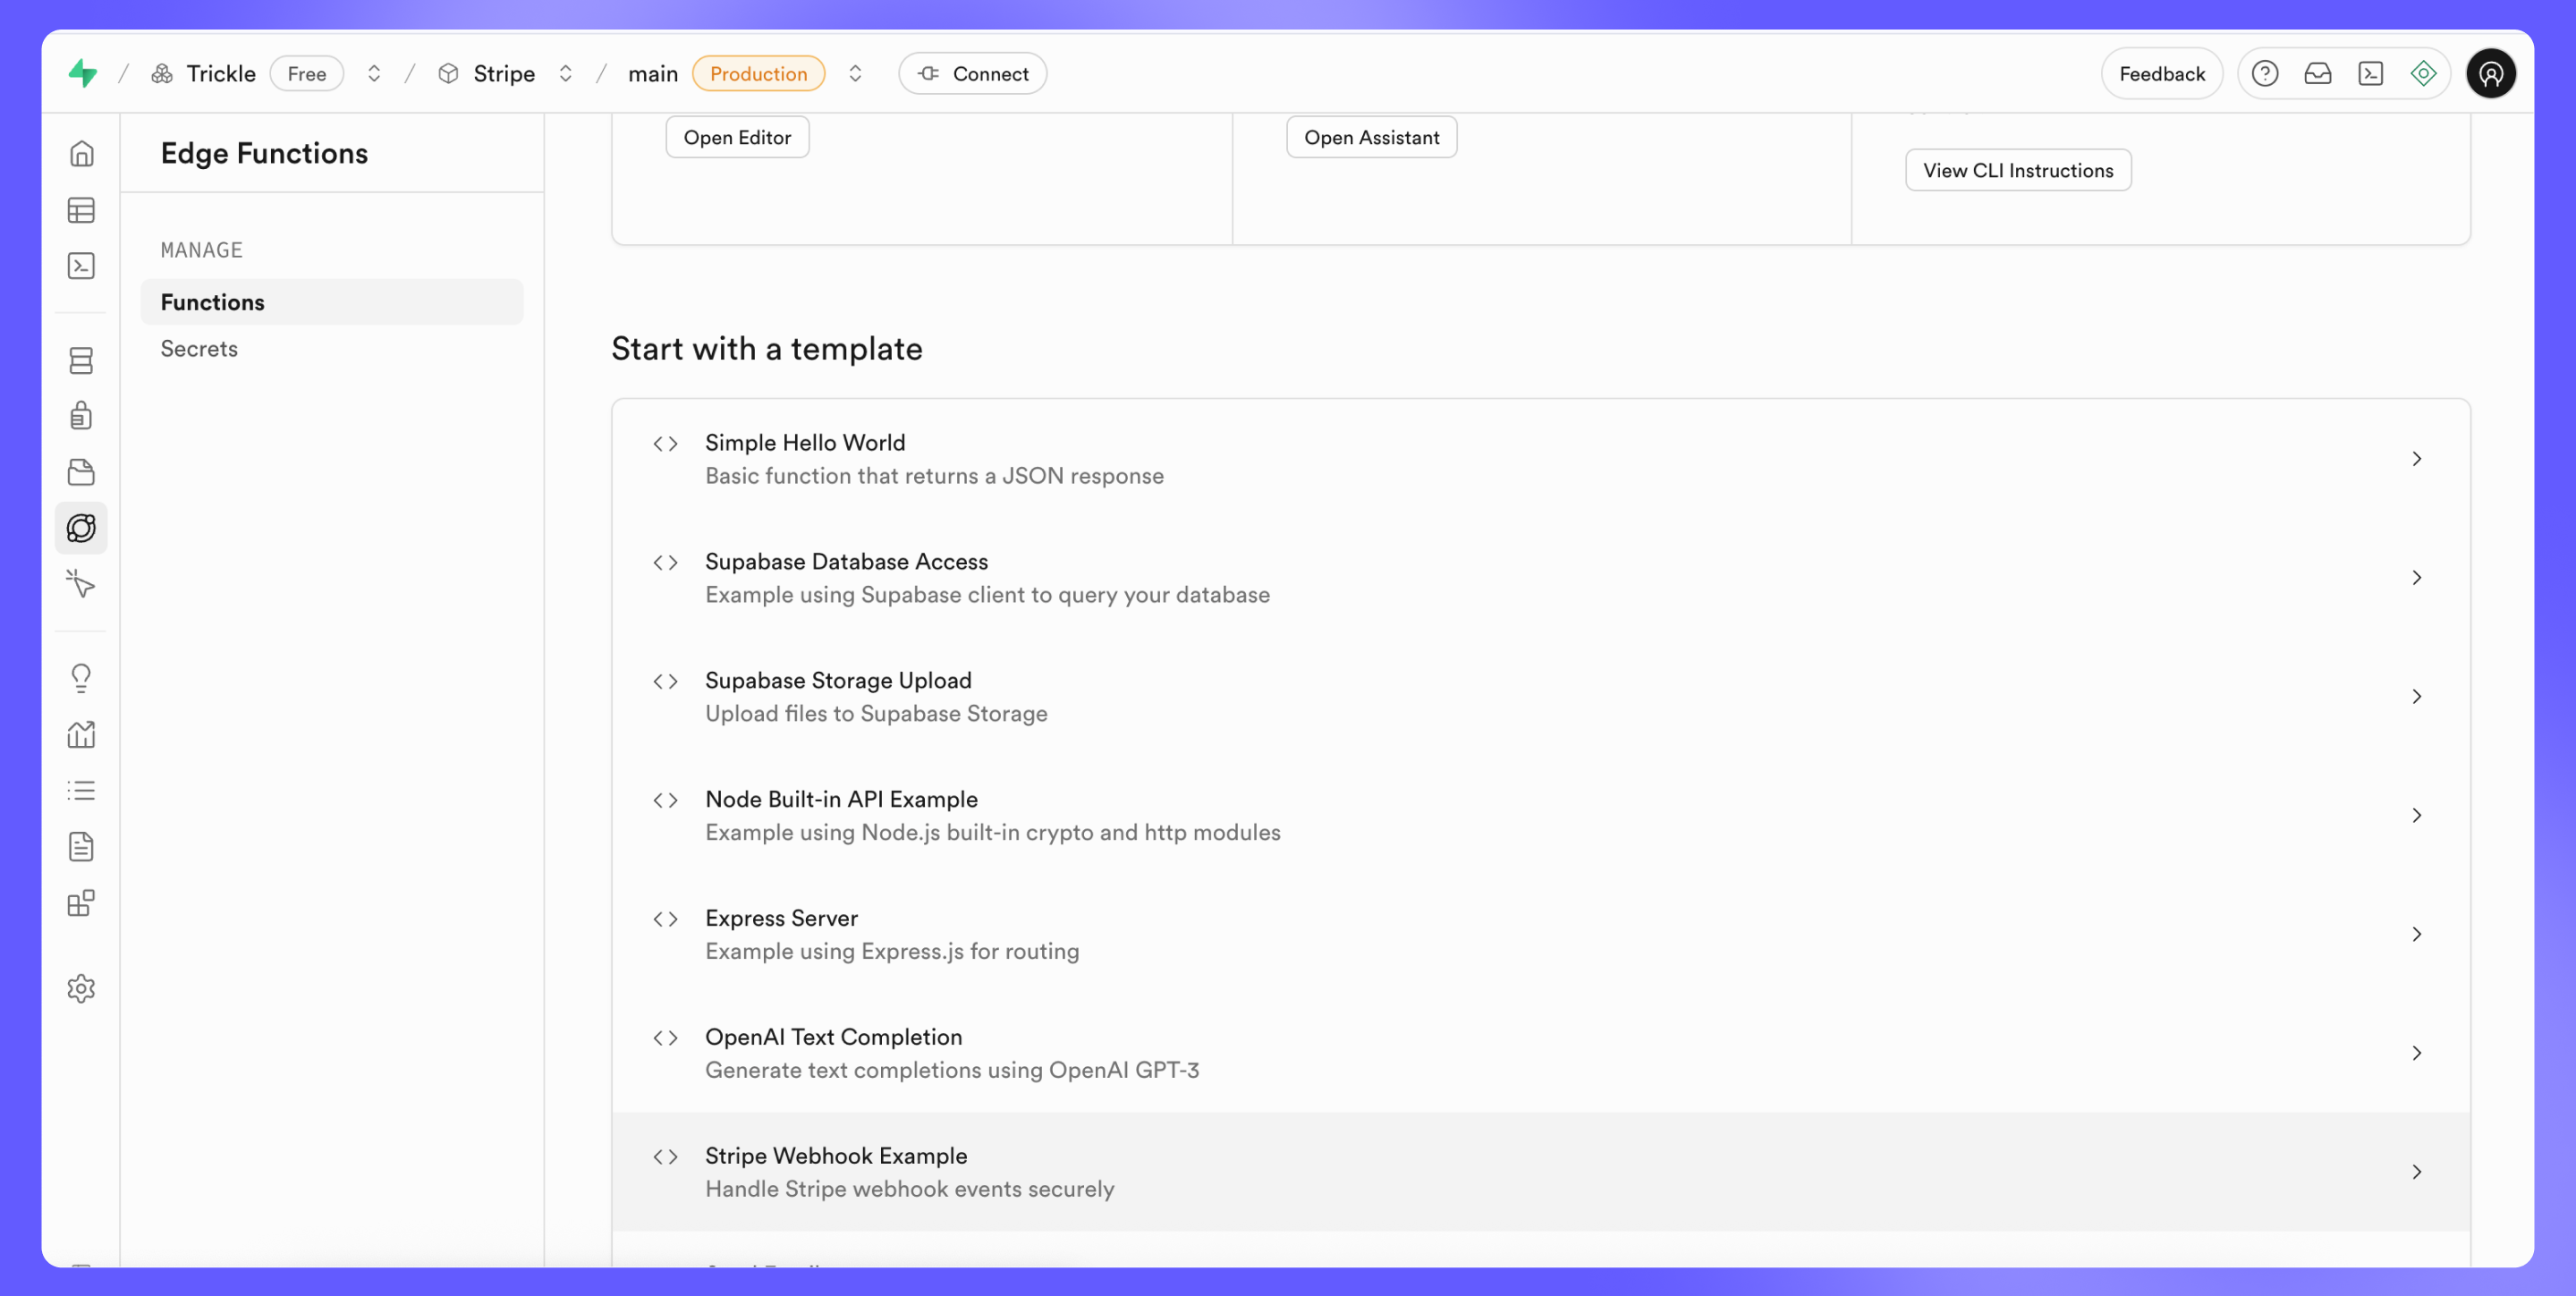
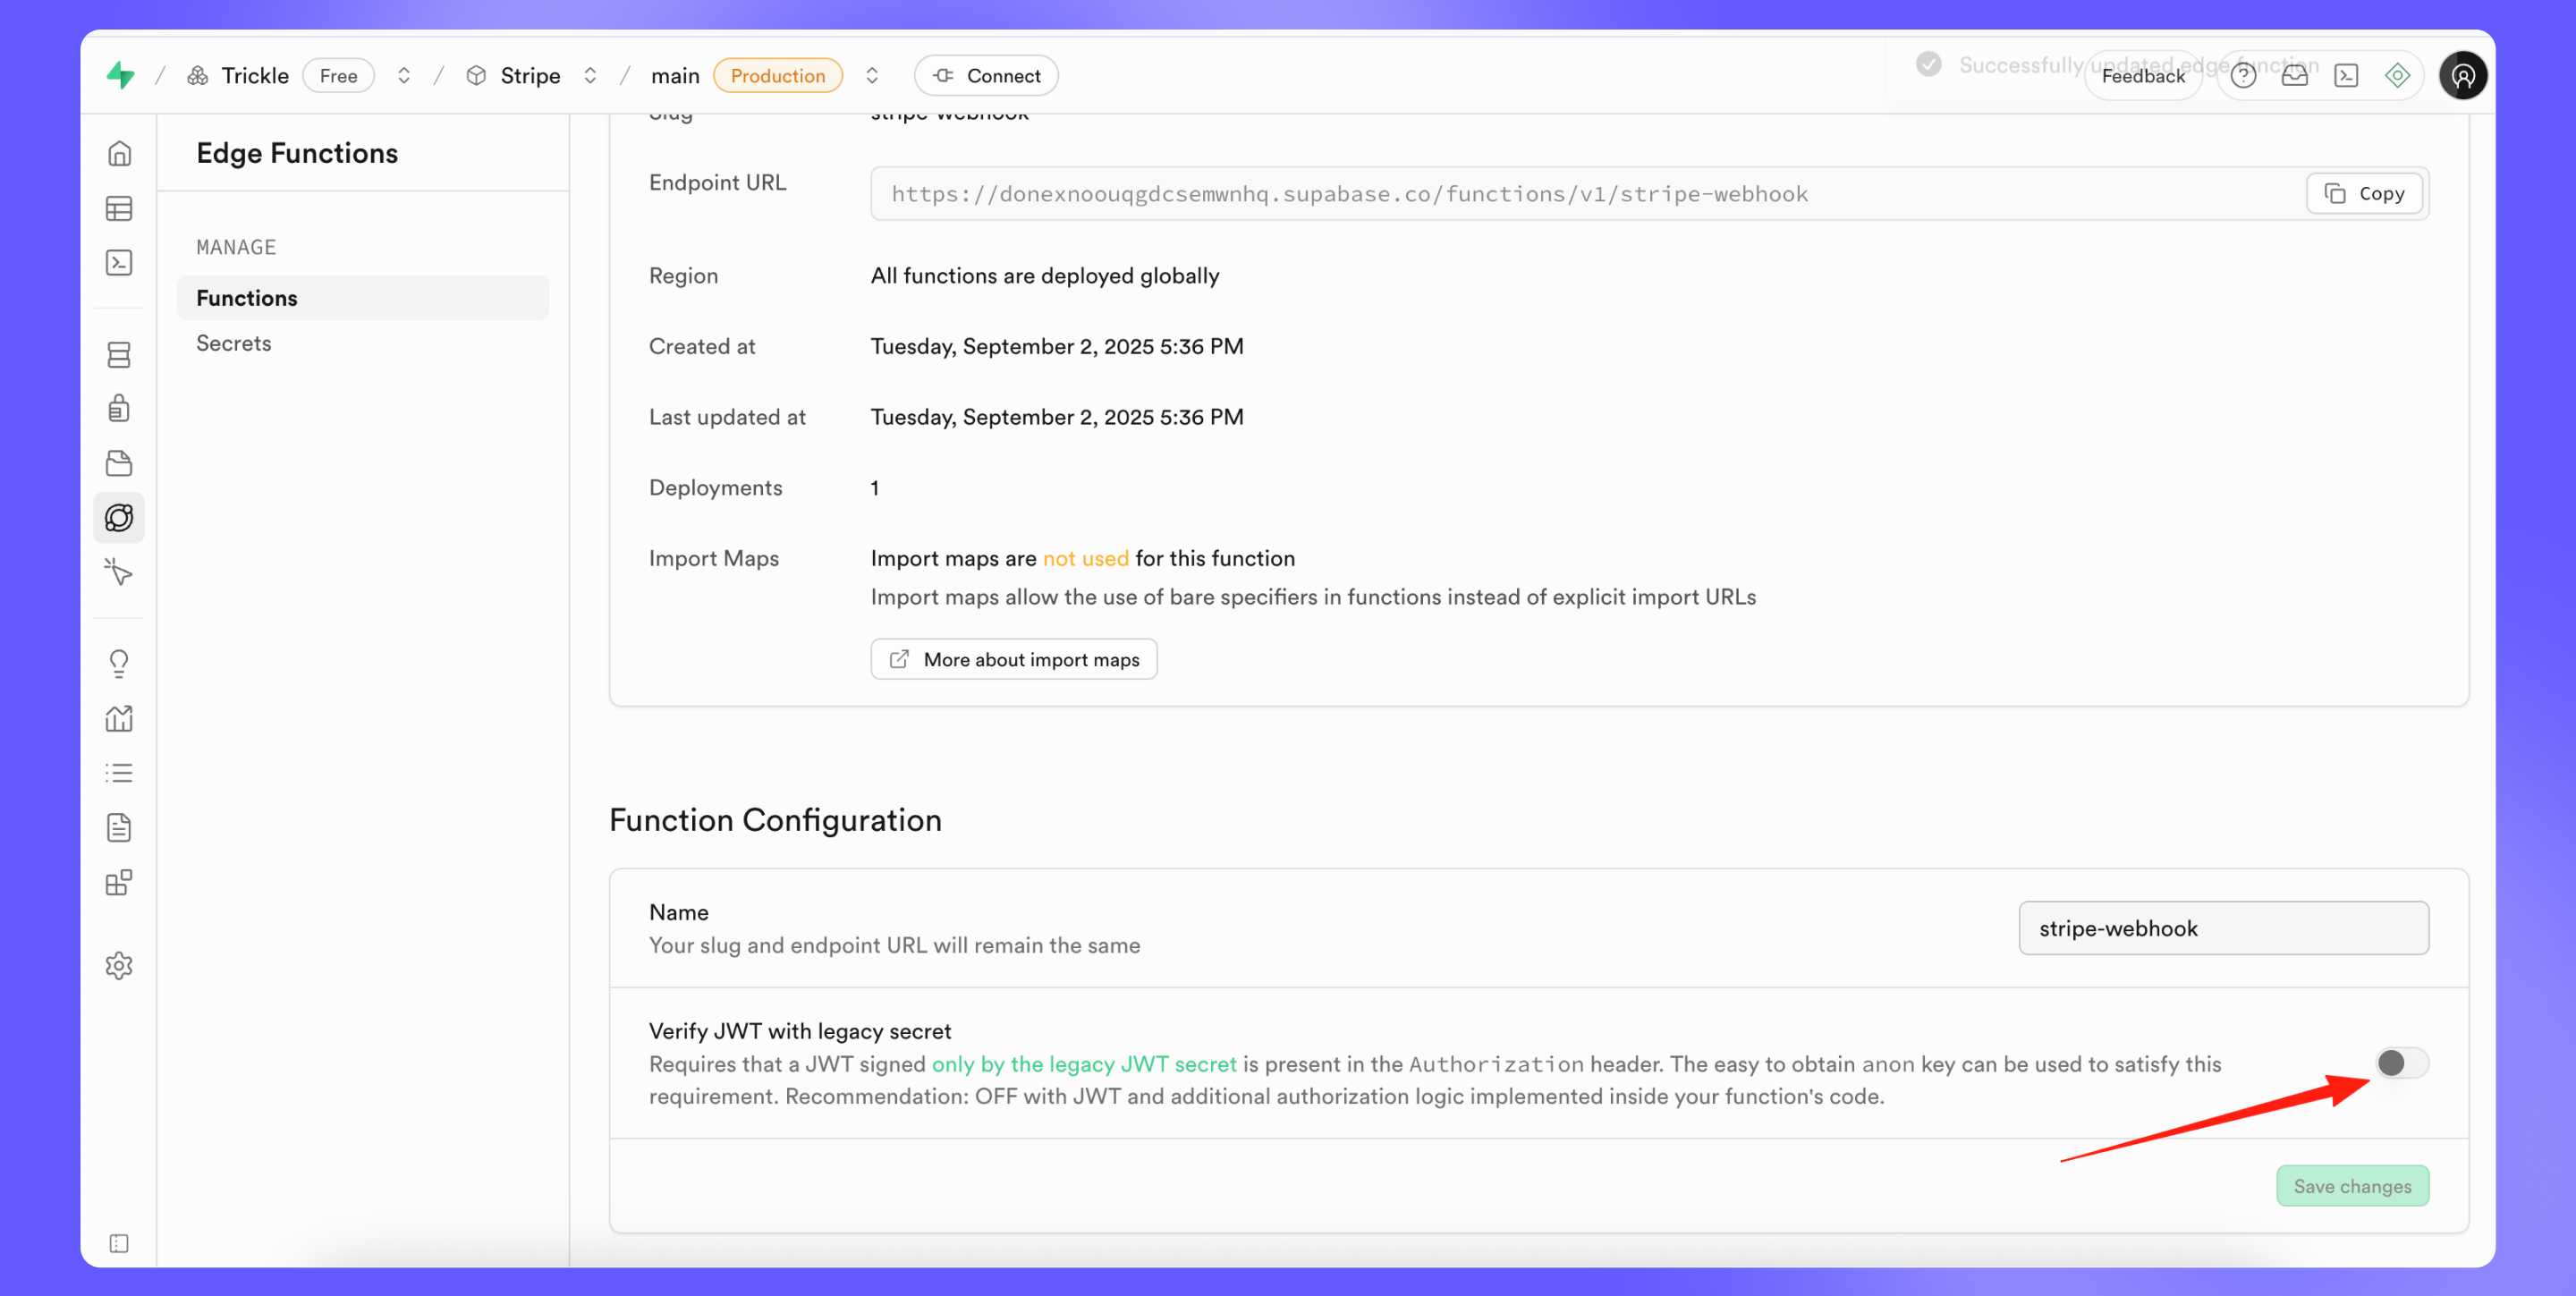
Deploy a Stripe Webhook Handler on Supabase
-
Deploy the stripe-webhook template function in Supabase.
-
Copy the function endpoint URL. For example:
https://projectid.supabase.co/functions/v1/stripe-webhook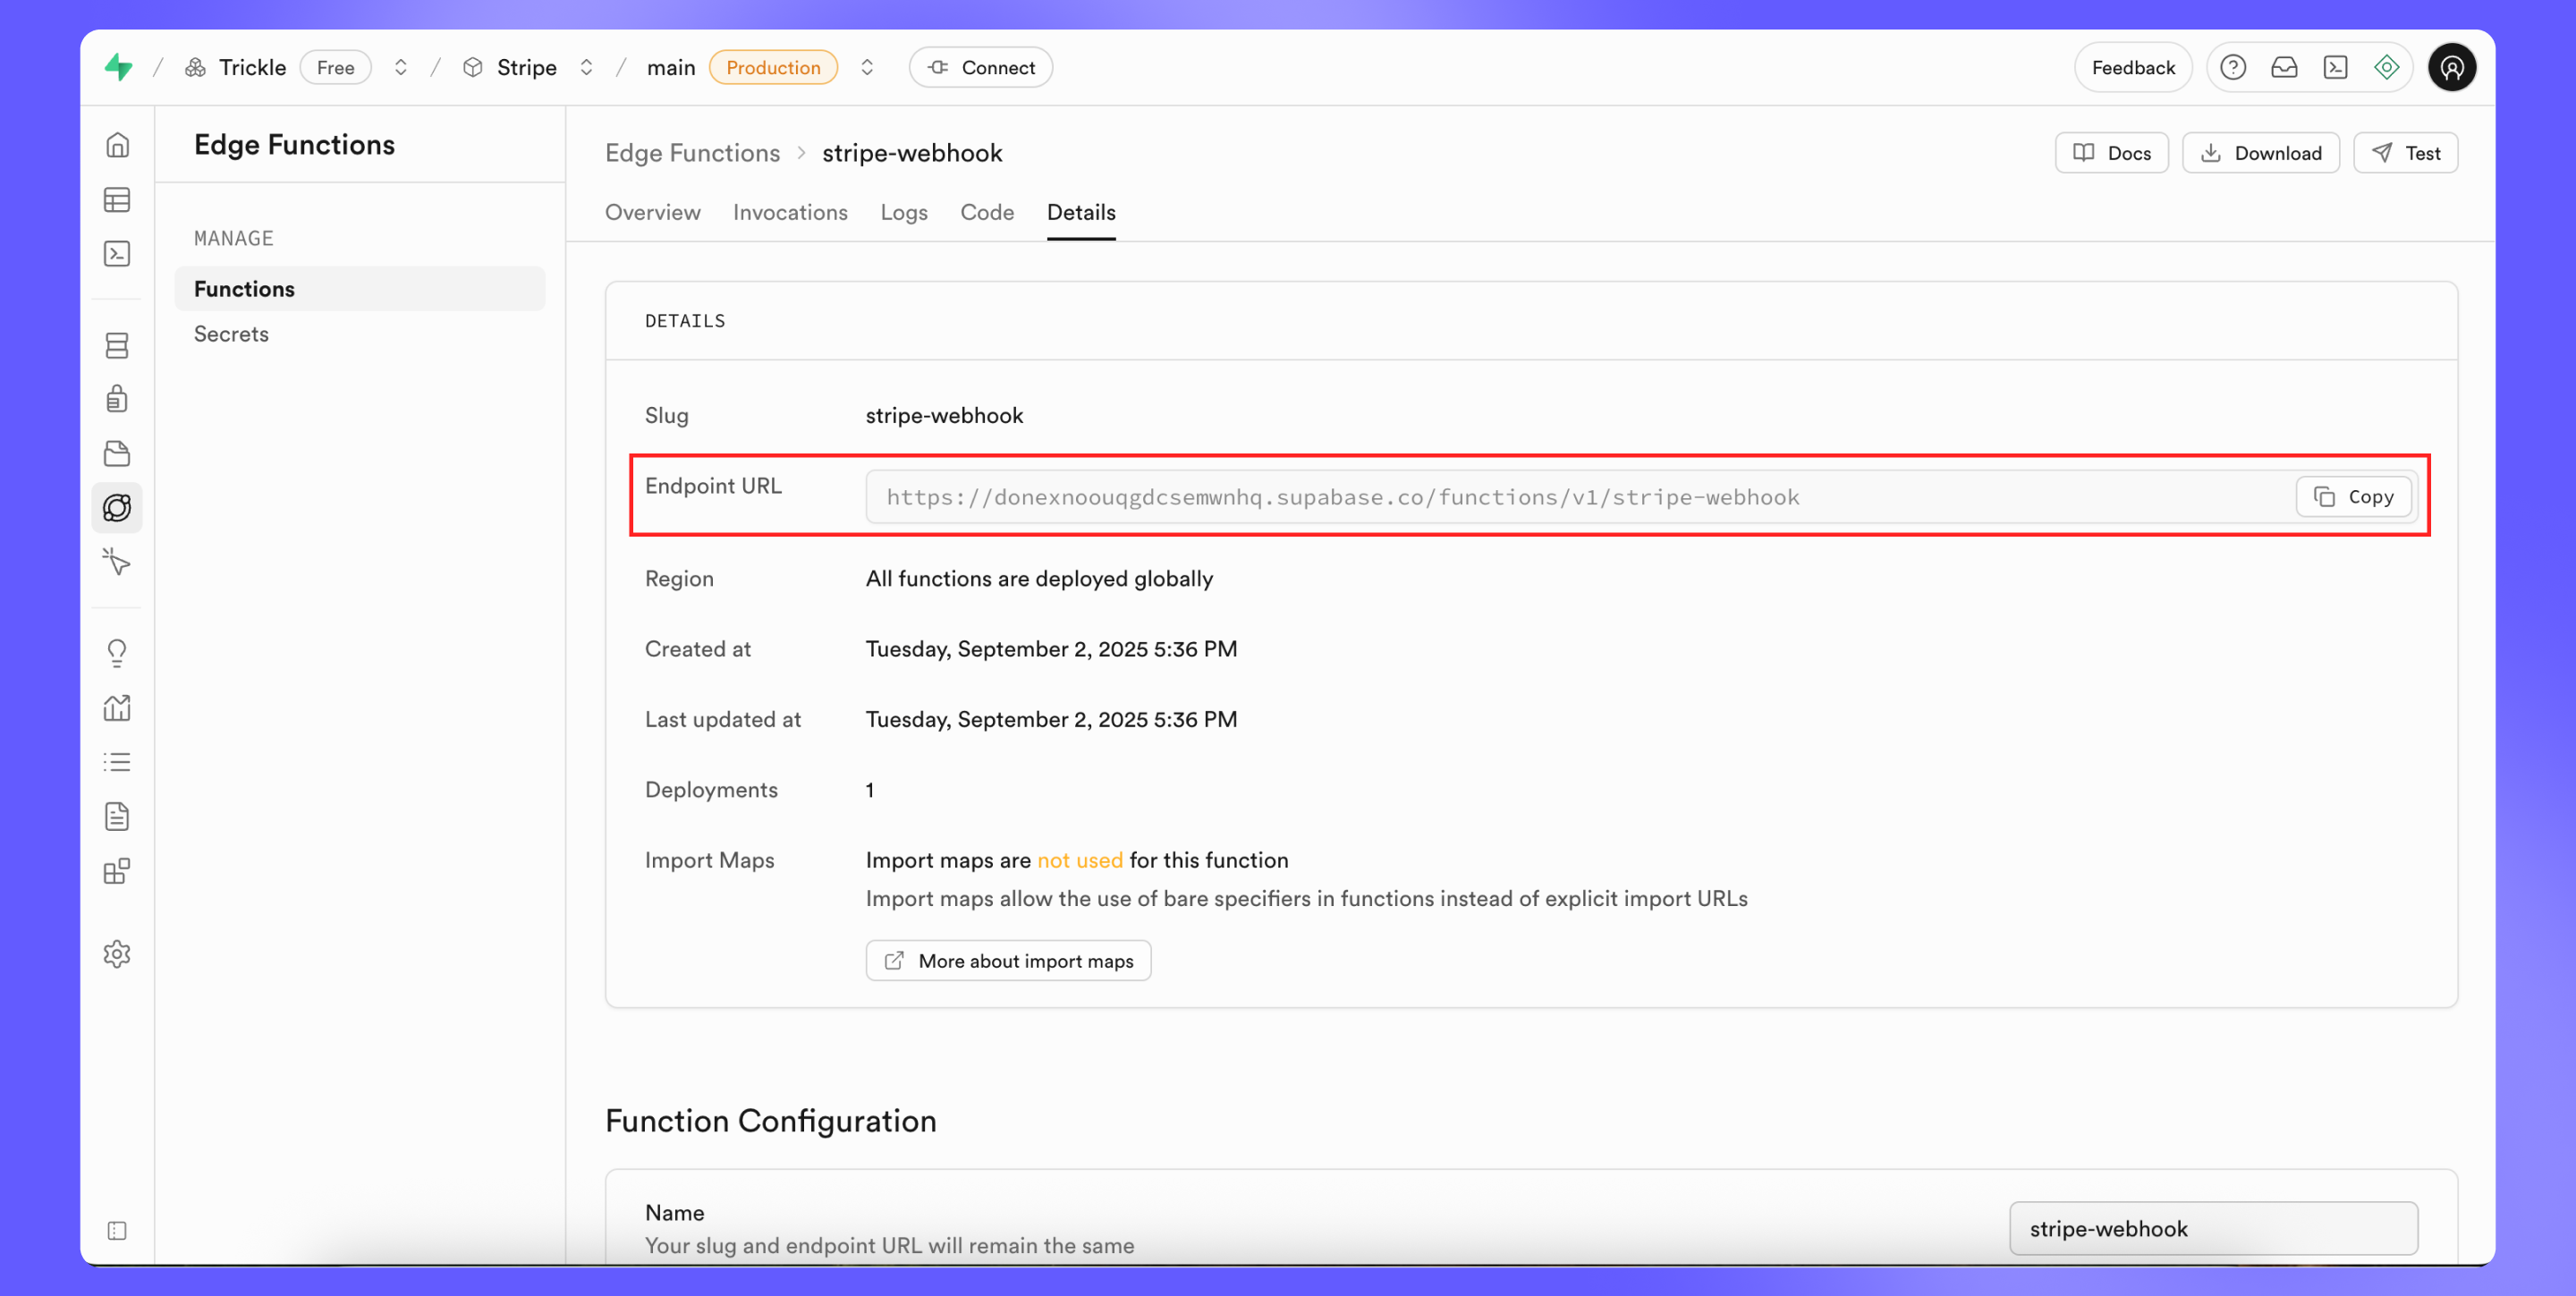
-
Disable JWT verification on this function.
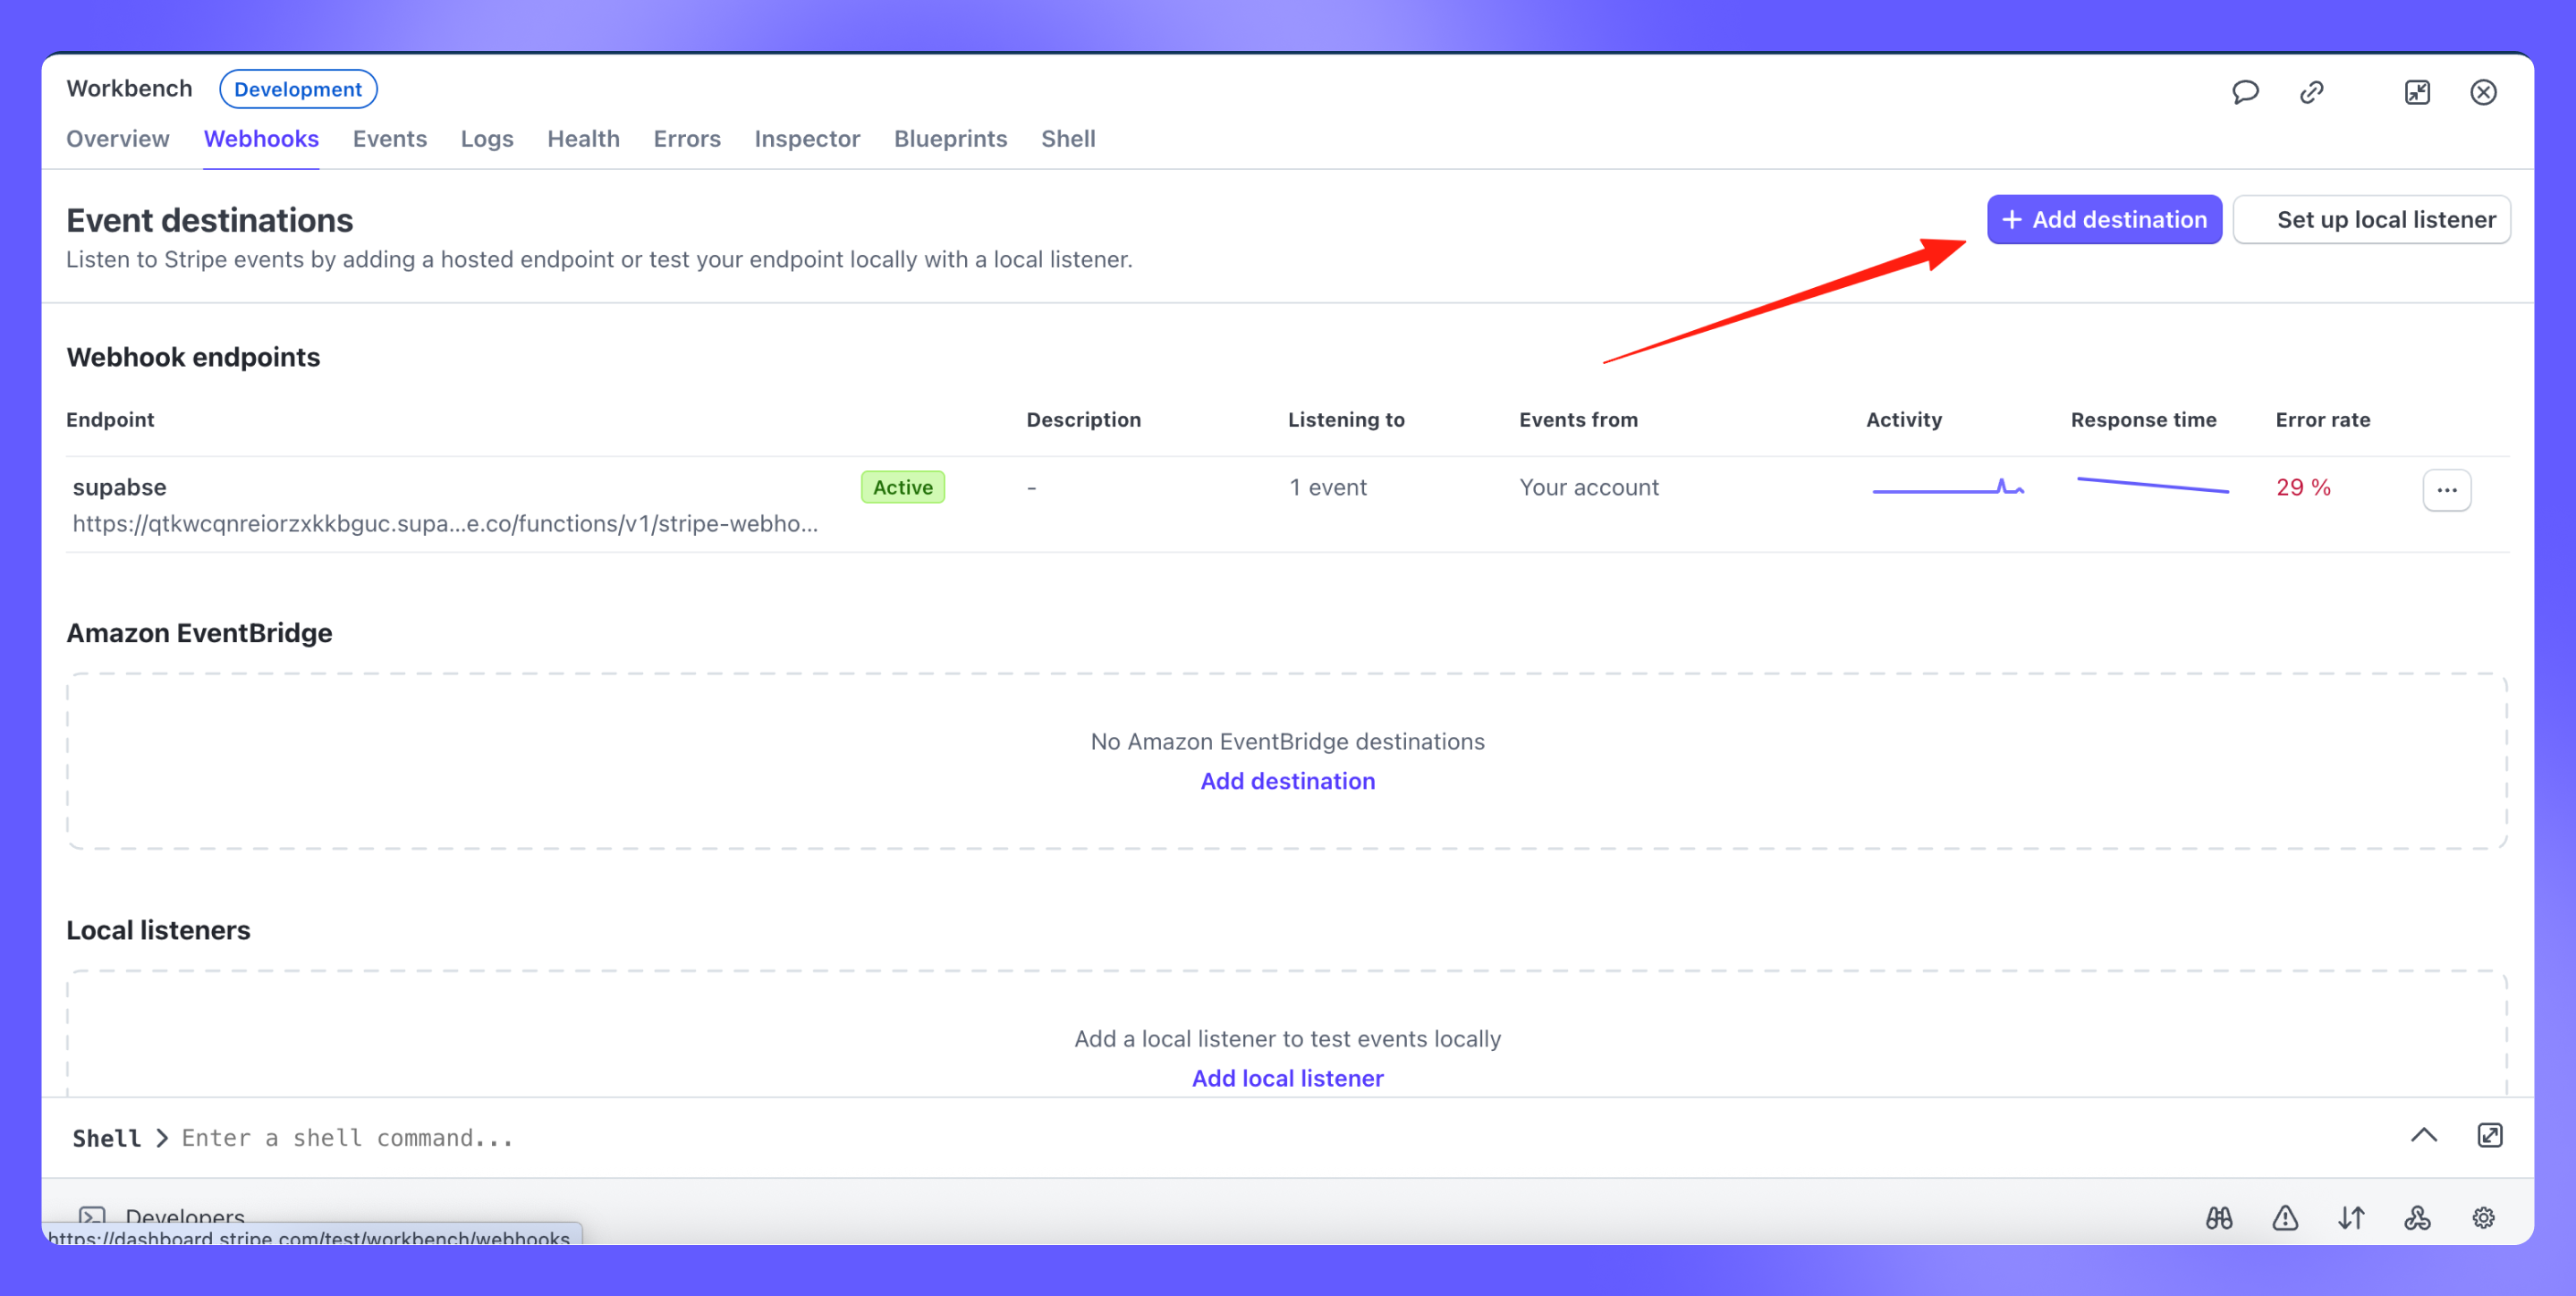
Set Up Stripe Webhook and Destination
-
Add a new webhook destination in Stripe.
-
Select the event type:
checkout.session.completed.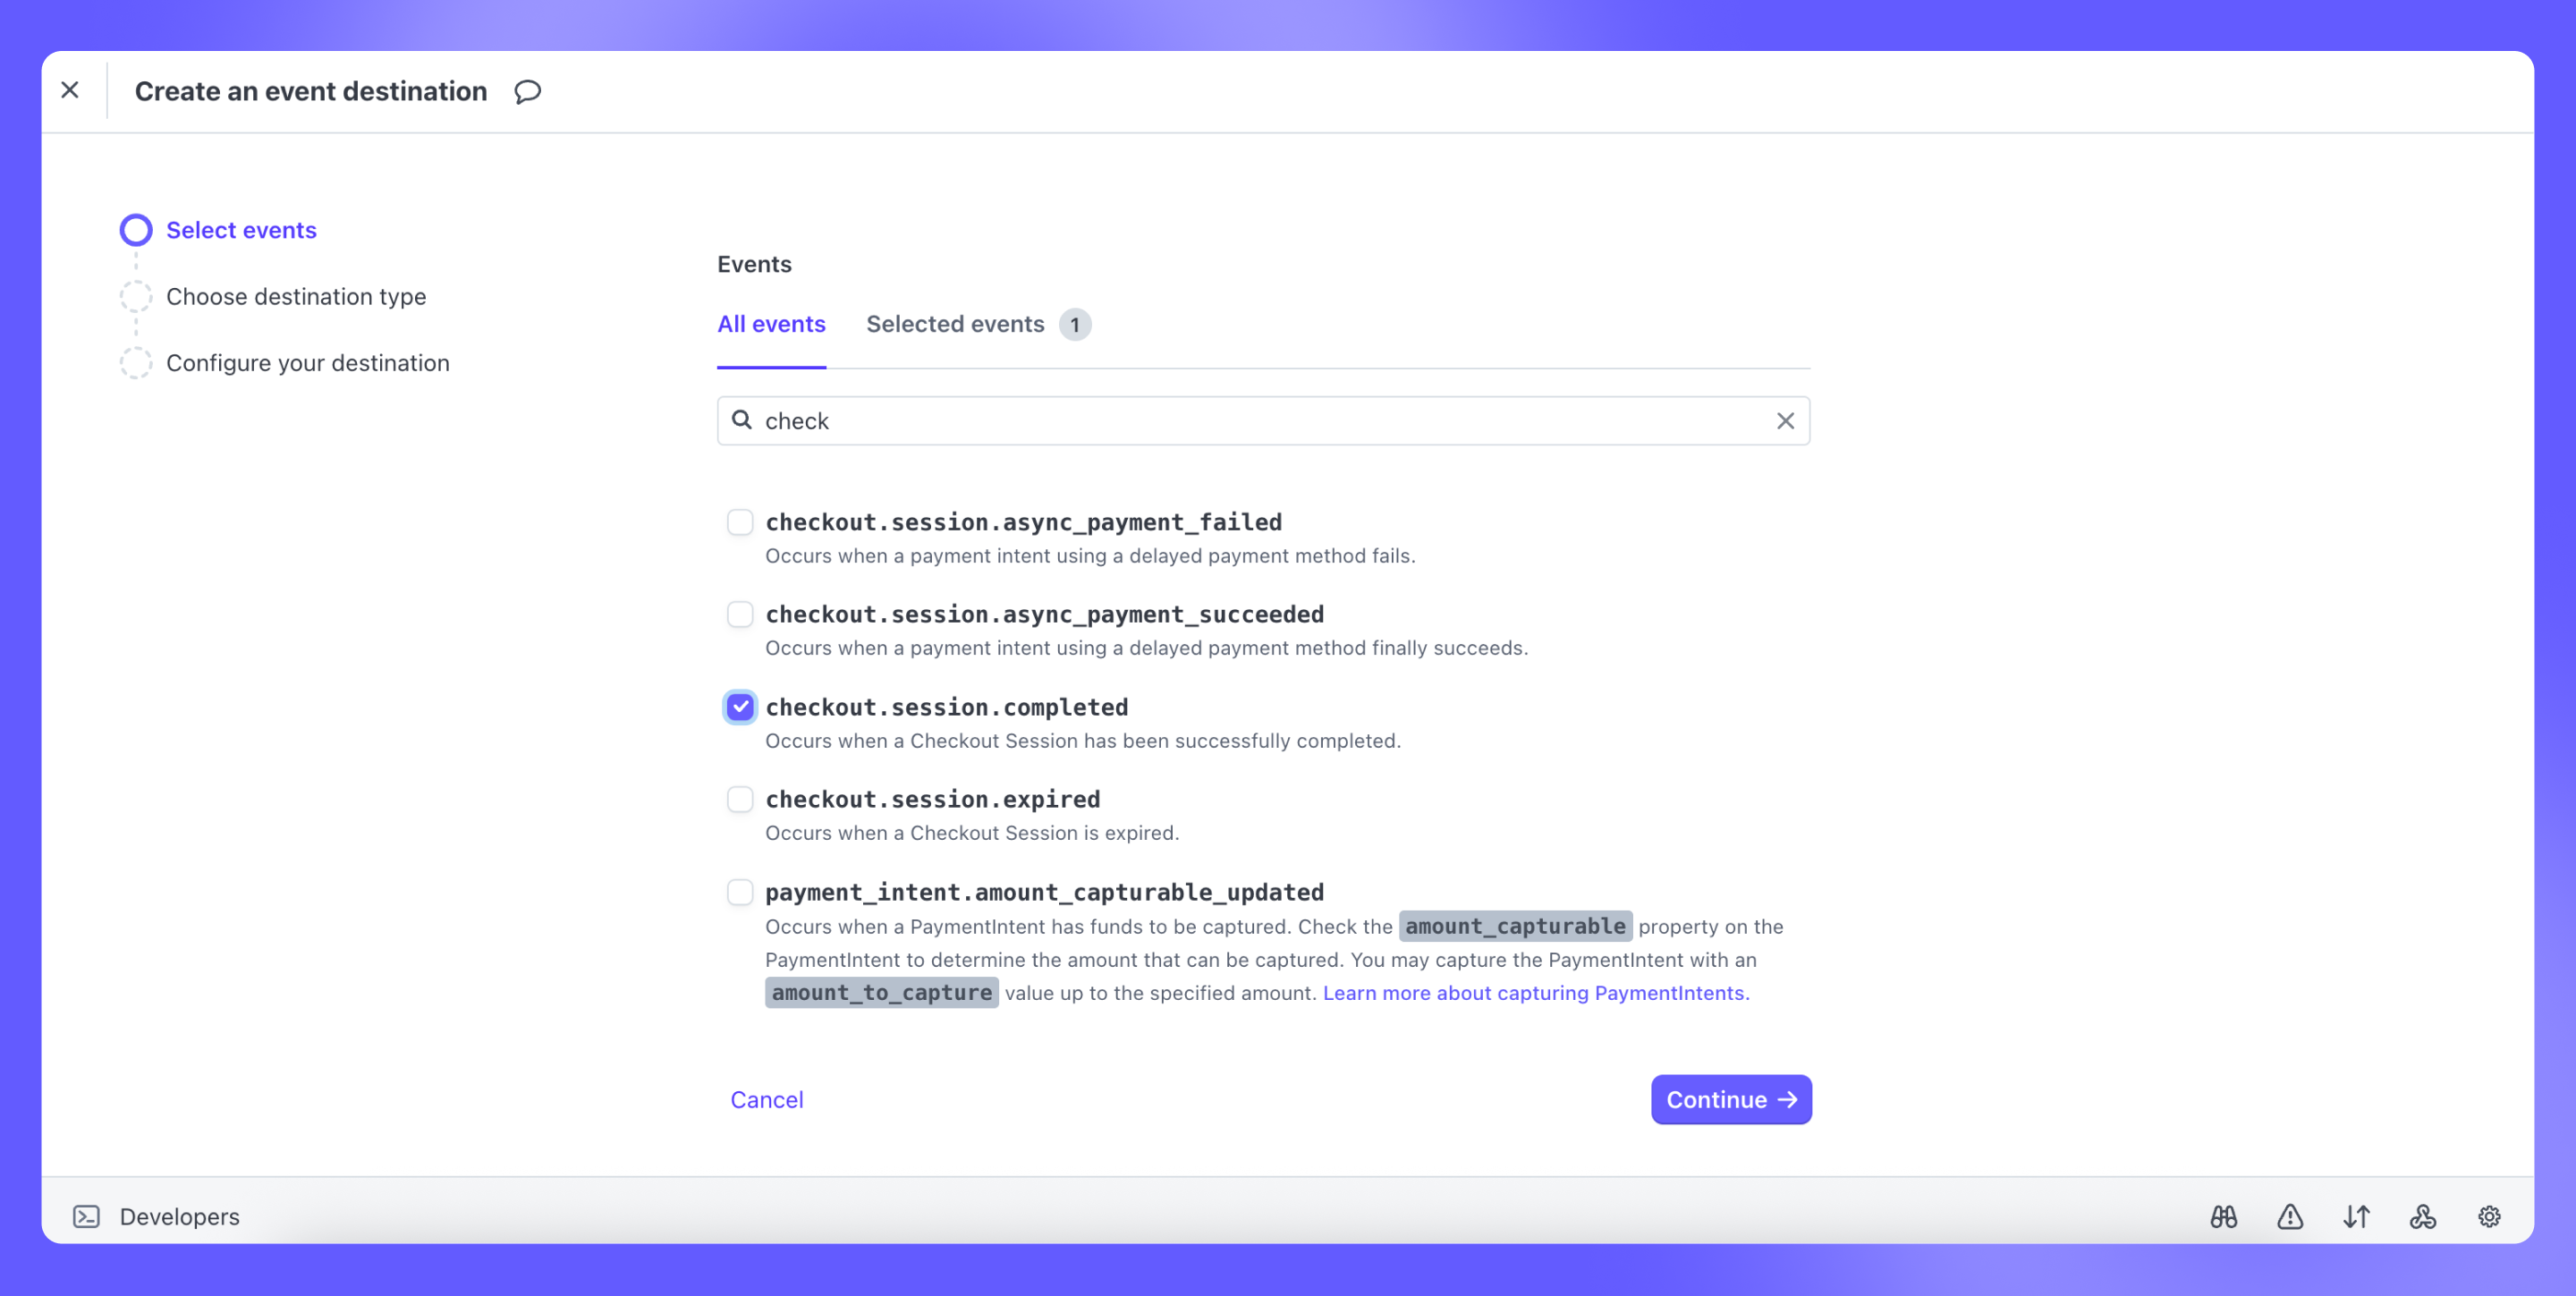
-
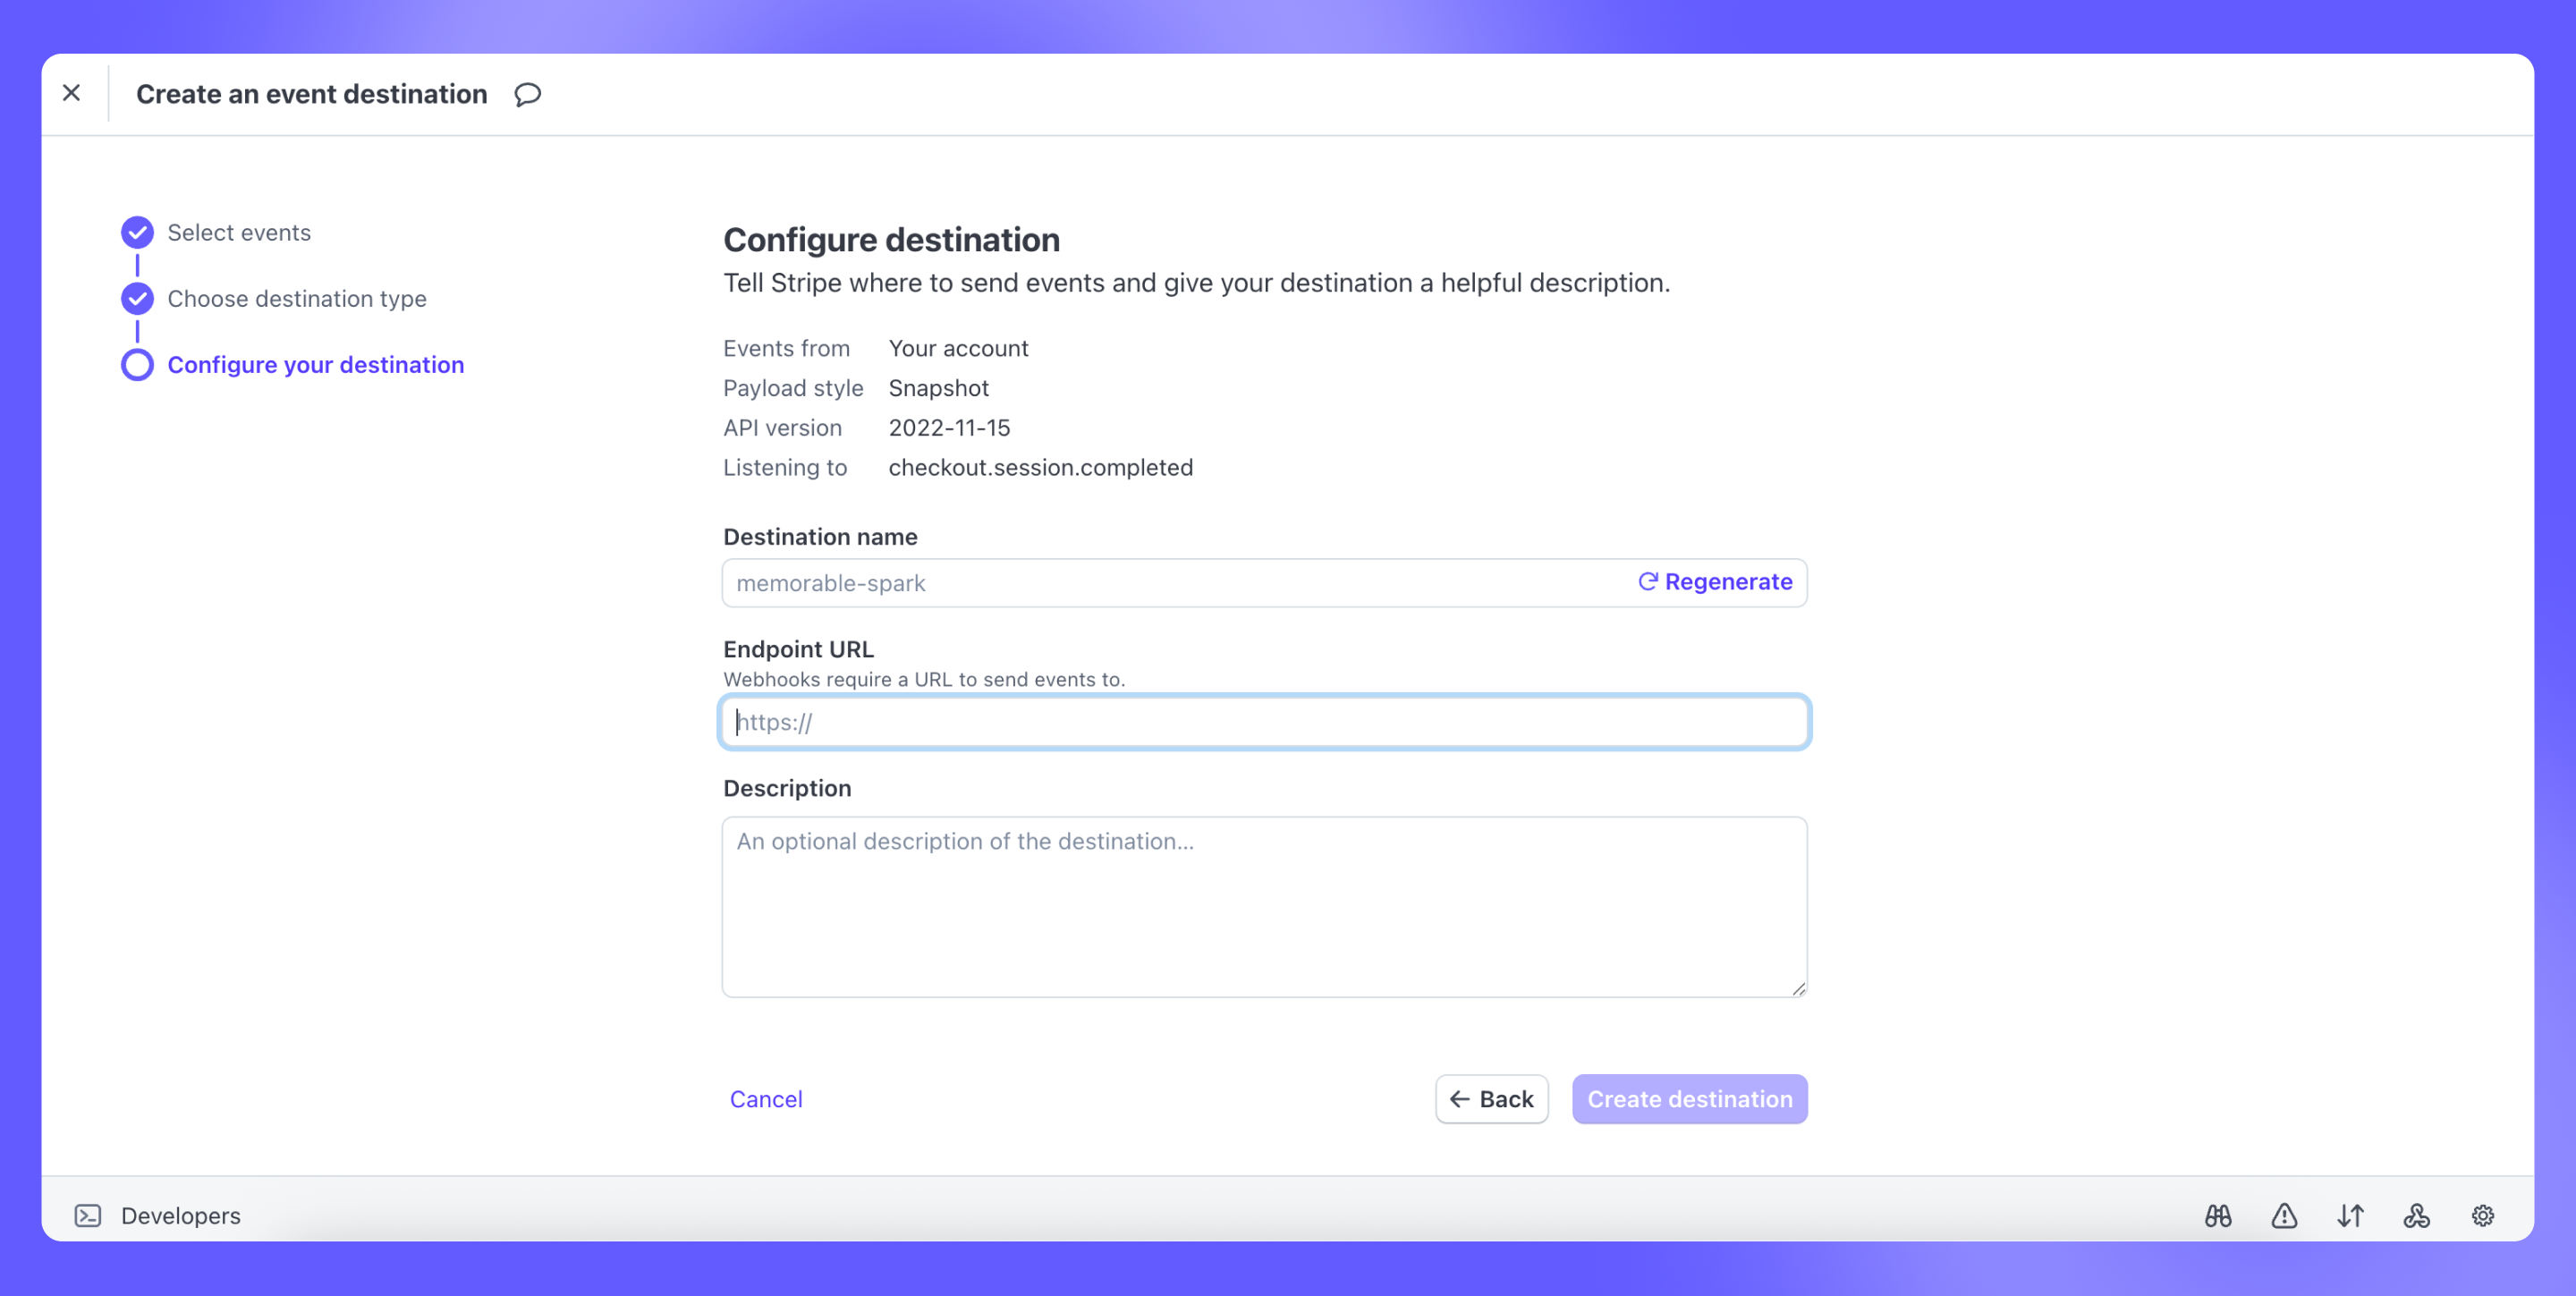
Set the webhook endpoint to the Supabase Edge Function URL above.
-
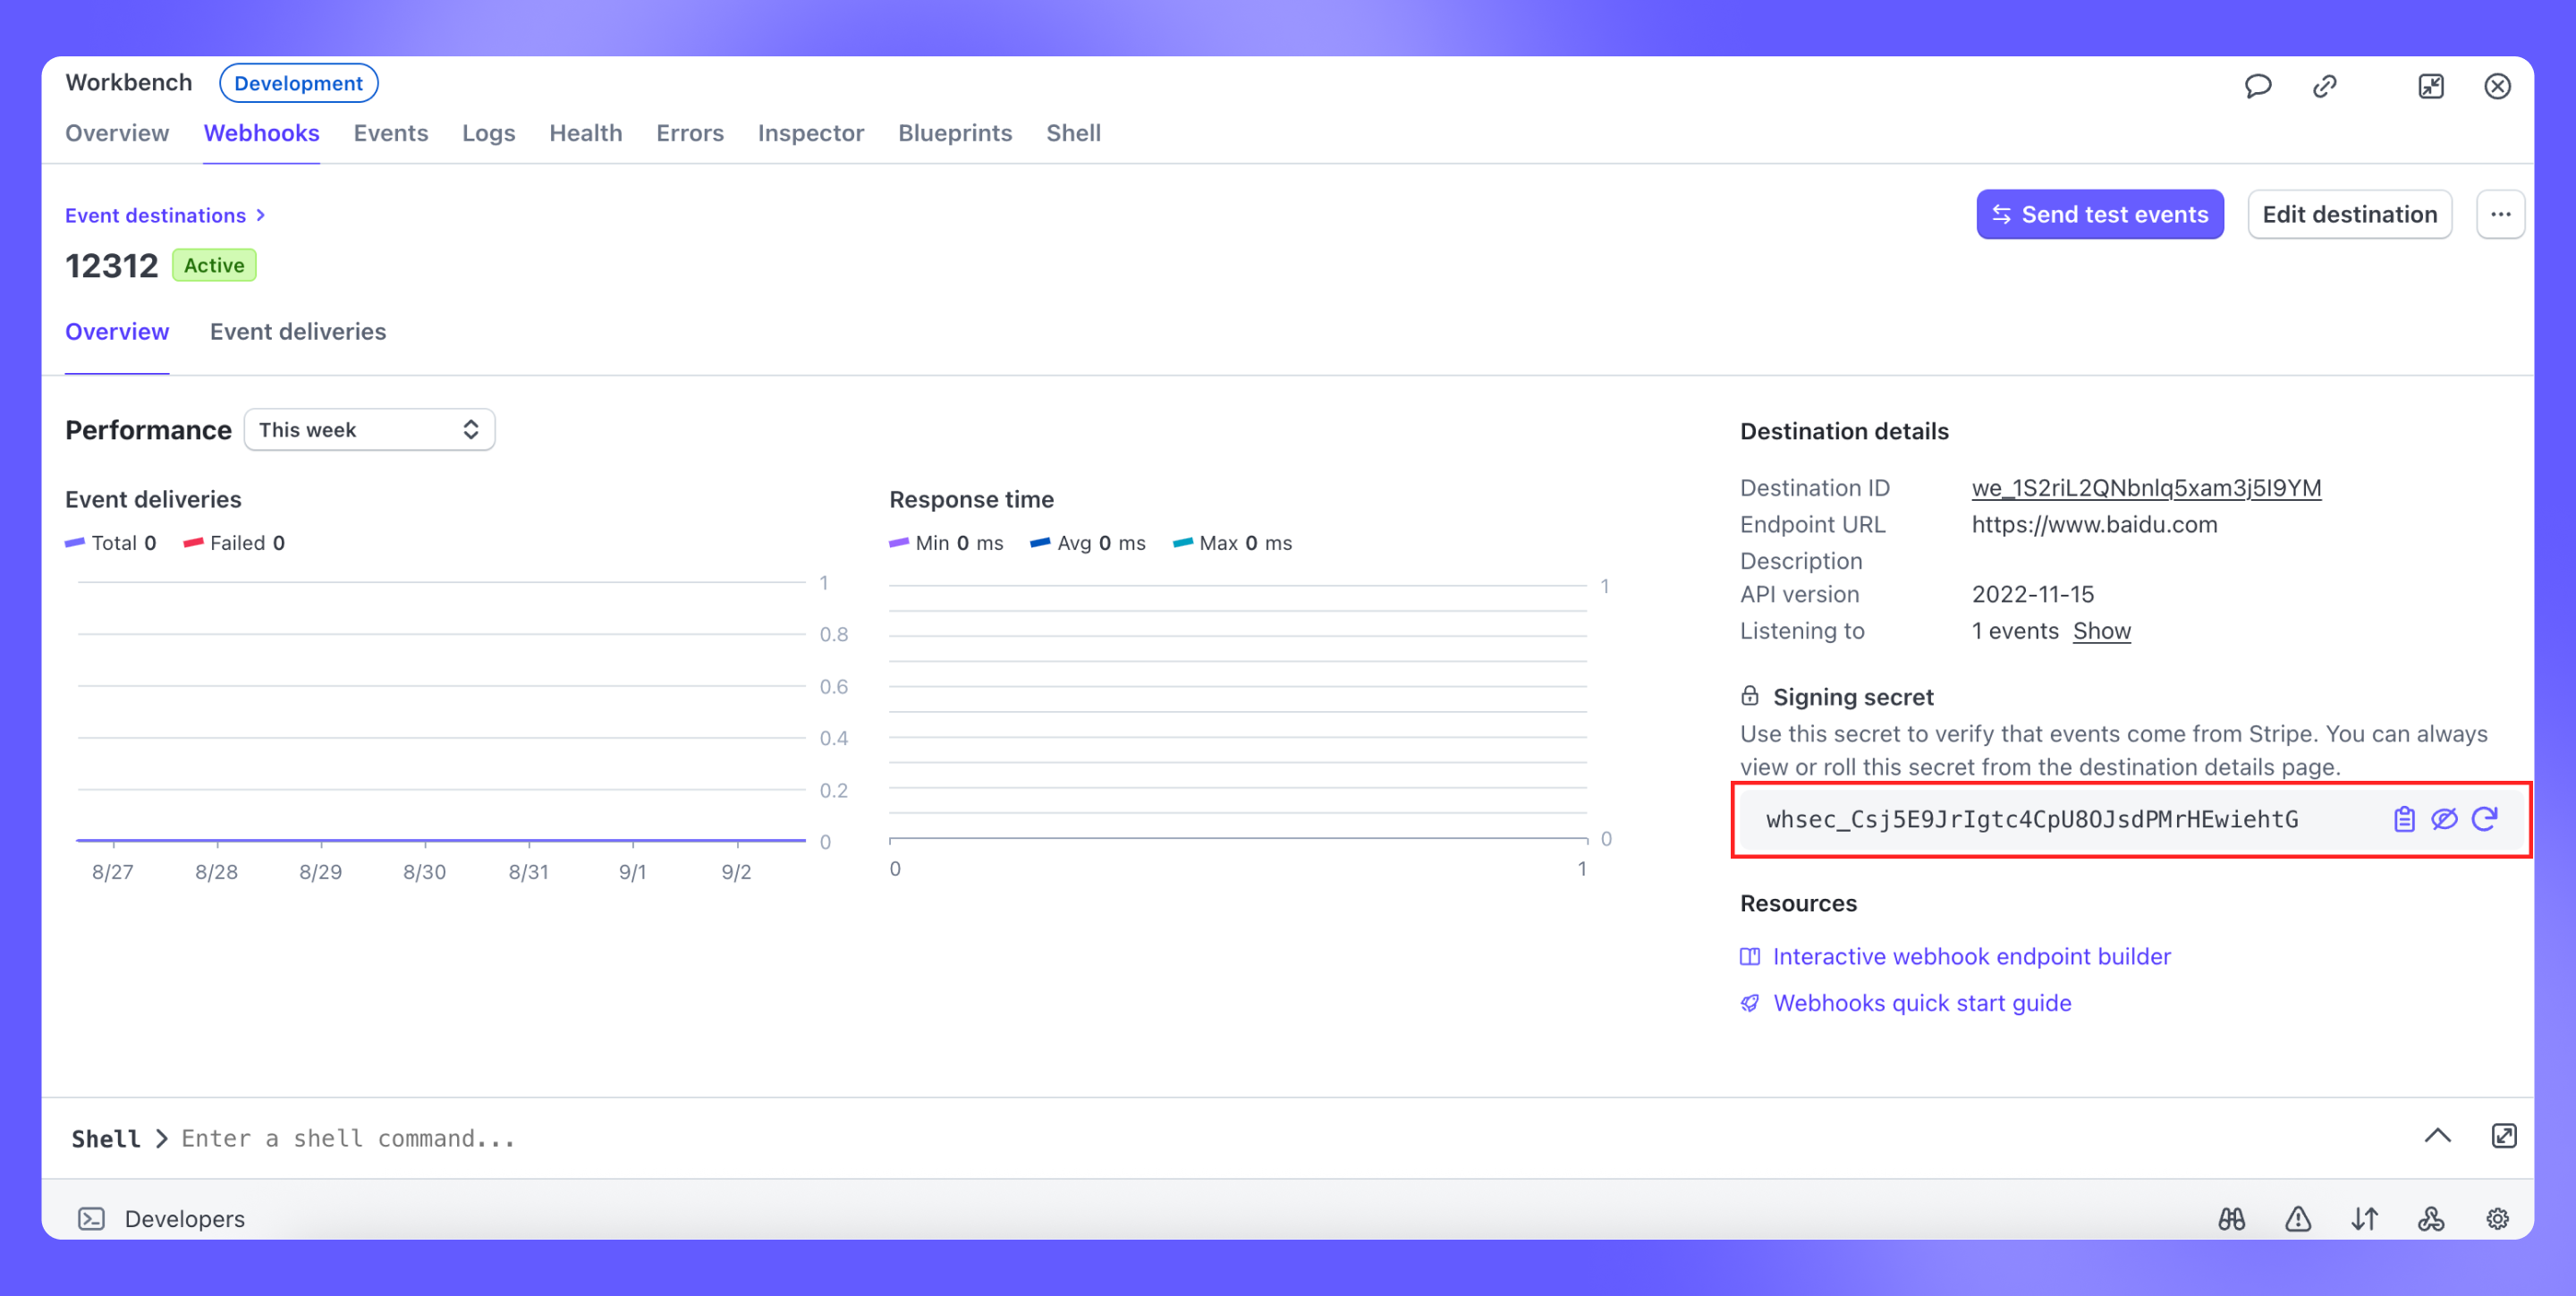
Copy the Webhook Signing Secret.
Configure Stripe Webhook Secret in Supabase
-
In Supabase, go to environment variables and set:
Key:
STRIPE_WEBHOOK_SIGNING_SECRETValue:[your secret from the previous step]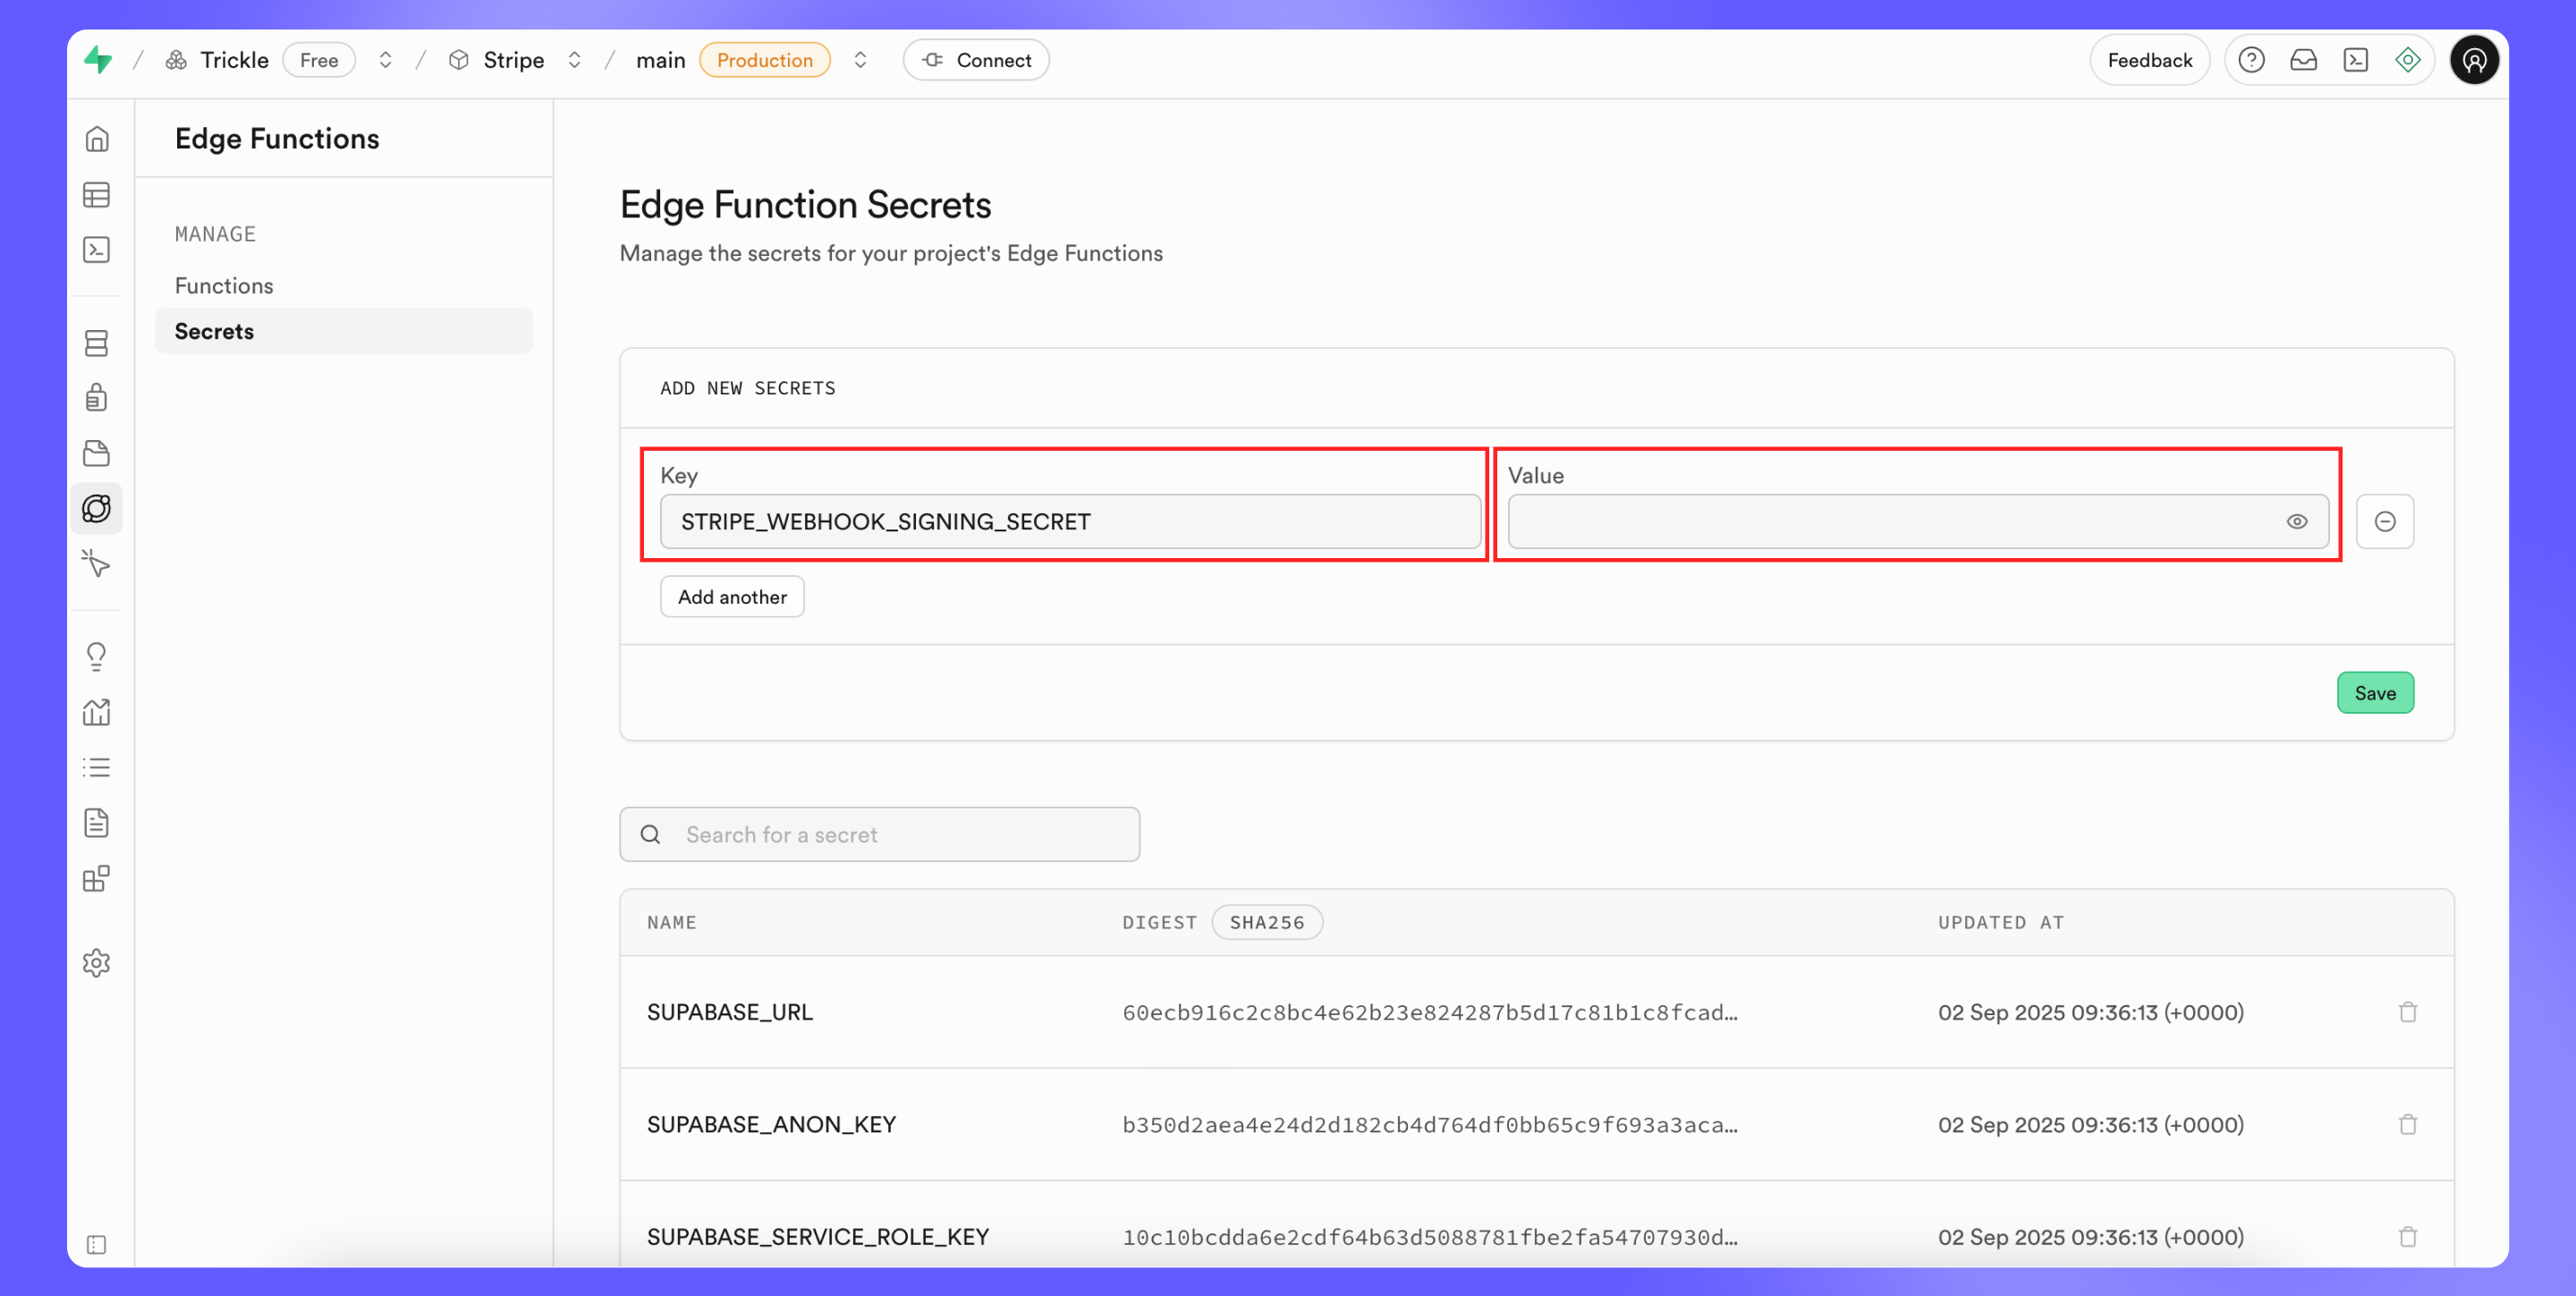
Use Trickle AI to Generate Edge Function Code
-
Paste the Supabase Edge Function code into Trickle AI.
“This is a Supabase Edge Function for handling Stripe webhook events. Please modify it so that when a checkout.session.completed event is received, it updates the user’s subscription status to true in the Supabase database.”You can also paste an example Stripe event payload to help AI better understand the context.
Deploy & Test the Edge Function
- Copy the code from Trickle AI and paste it to Supabase Edge function.
- Test using Stripe’s test mode, with card number
4242 4242 4242 4242.